SSO Setup
SSO This guide walks you through configuring Single Sign-On for your website using the FanFest Platform and your OIDC identity provider.Prerequisites
Before starting, ensure you have:
- A working FanFest embed on your site
- An OIDC-compliant identity provider (Auth0, Okta, Keycloak, Azure AD, etc.)
- A deployed website with a valid SSL certificate (HTTPS)
- FanFest channel admin access to configure SSO in the dashboard
You will need these details from your identity provider:
- Issuer URL
- Authorization Endpoint
- Token Endpoint
- Client ID and Client Secret for the FanFest application
Step 1: Register FanFest with Your Identity Provider
Create a new application/client in your identity provider for the FanFest integration.
Set the application type to Regular Web Application (or equivalent for your provider).
Configure the redirect URI to include FanFest's Identity Platform callback URL:
plaintexthttps://6c8kp9bzu6.execute-api.eu-west-1.amazonaws.com/staging/auth/callbackNote down the Client ID and Client Secret from your provider after creating the application.
Identify the Issuer URL, Authorization Endpoint, and Token Endpoint from your provider's documentation.
See an Example Auth0 Configuration
- Log in to your Auth0 dashboard.
- Navigate to "Applications" and click "Create Application".
- Select "Regular Web Application" as the application type.
- Navigate to the "Settings" tab of your new application.
- Set the following fields:
- Allowed Callback URLs:plaintext
https://6c8kp9bzu6.execute-api.eu-west-1.amazonaws.com/staging/auth/callback - Save changes.
- Allowed Callback URLs:
- Note down the Domain, Client ID, and Client Secret from the application settings.
Use the Domain to derive the OIDC endpoints:
| Endpoint | URL Format |
|---|---|
| Issuer URL | https://<YOUR_AUTH0_DOMAIN>/ |
| Authorization Endpoint | https://<YOUR_AUTH0_DOMAIN>/oauth/authorize |
| Token Endpoint | https://<YOUR_AUTH0_DOMAIN>/oauth/token |
For a complete Auth0 walkthrough, see the Auth0 Example.
At this point, you should have ready:
- Issuer URL, Authorization Endpoint, Token Endpoint from your provider
- Client ID and Client Secret for the FanFest application
Step 2: Configure Your Identity Provider in FanFest Dashboard
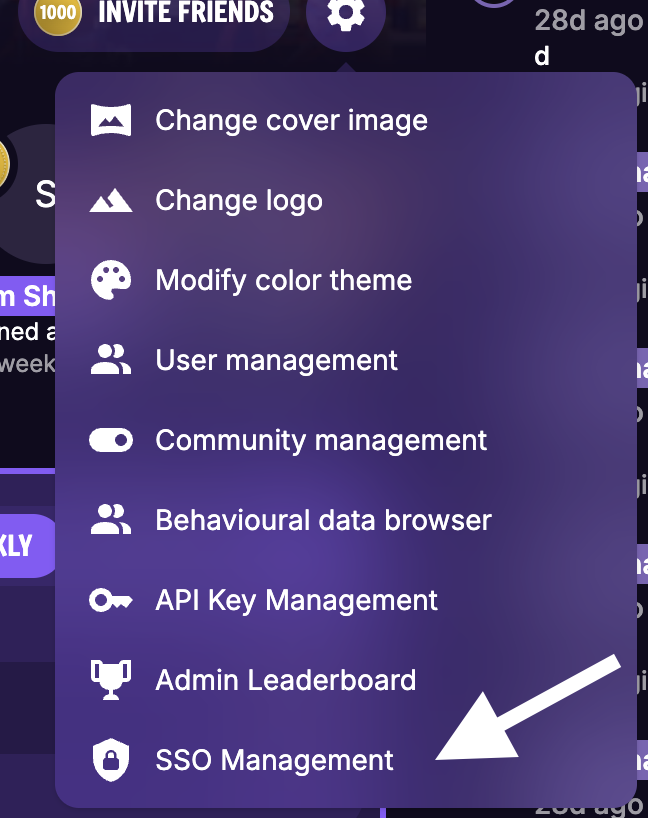
Log in to your FanFest account and open the channel admin tooltip in the header.
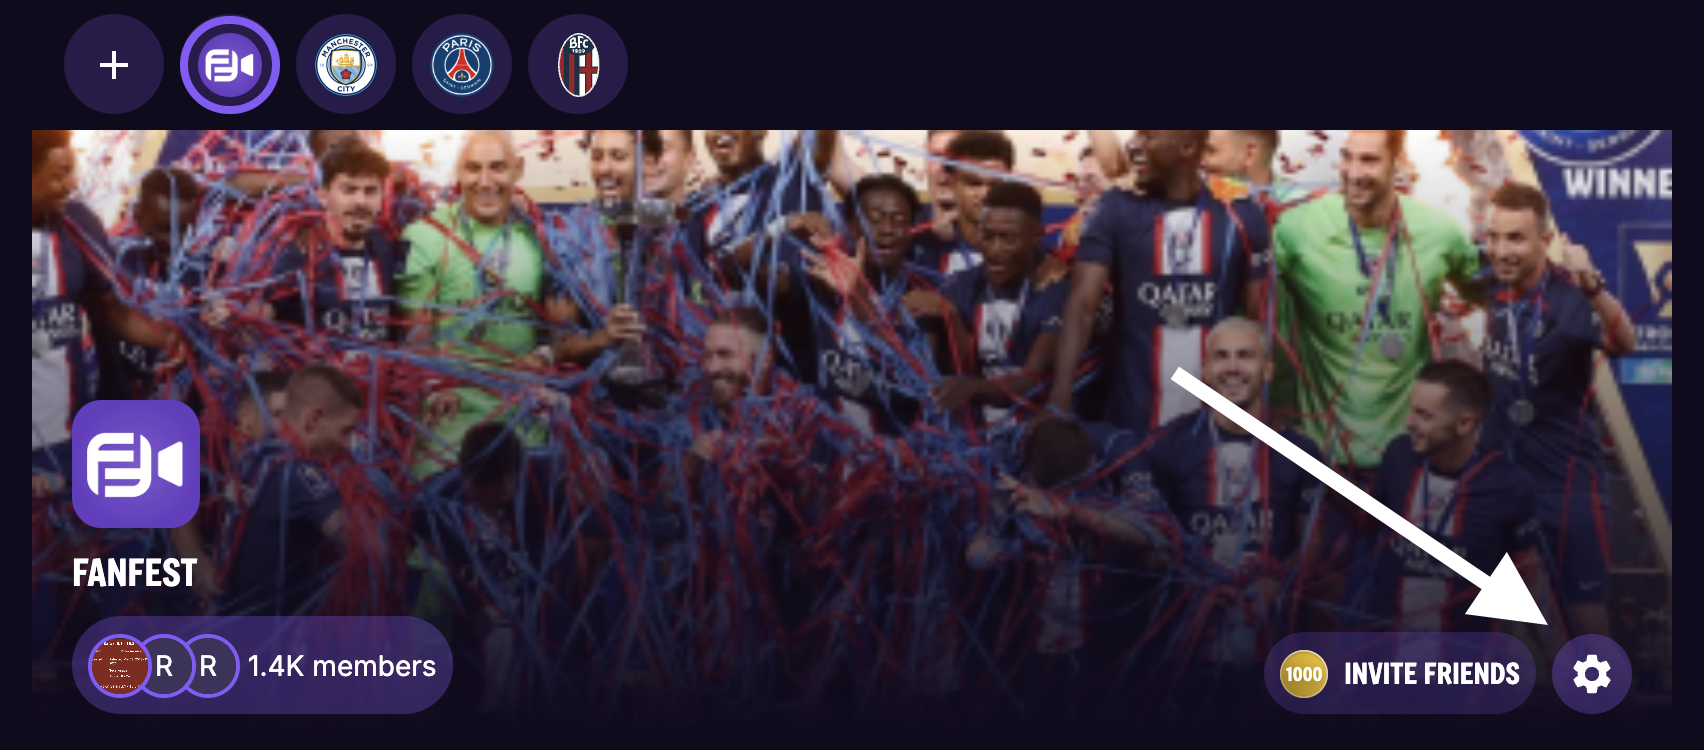
Navigate to SSO Management.
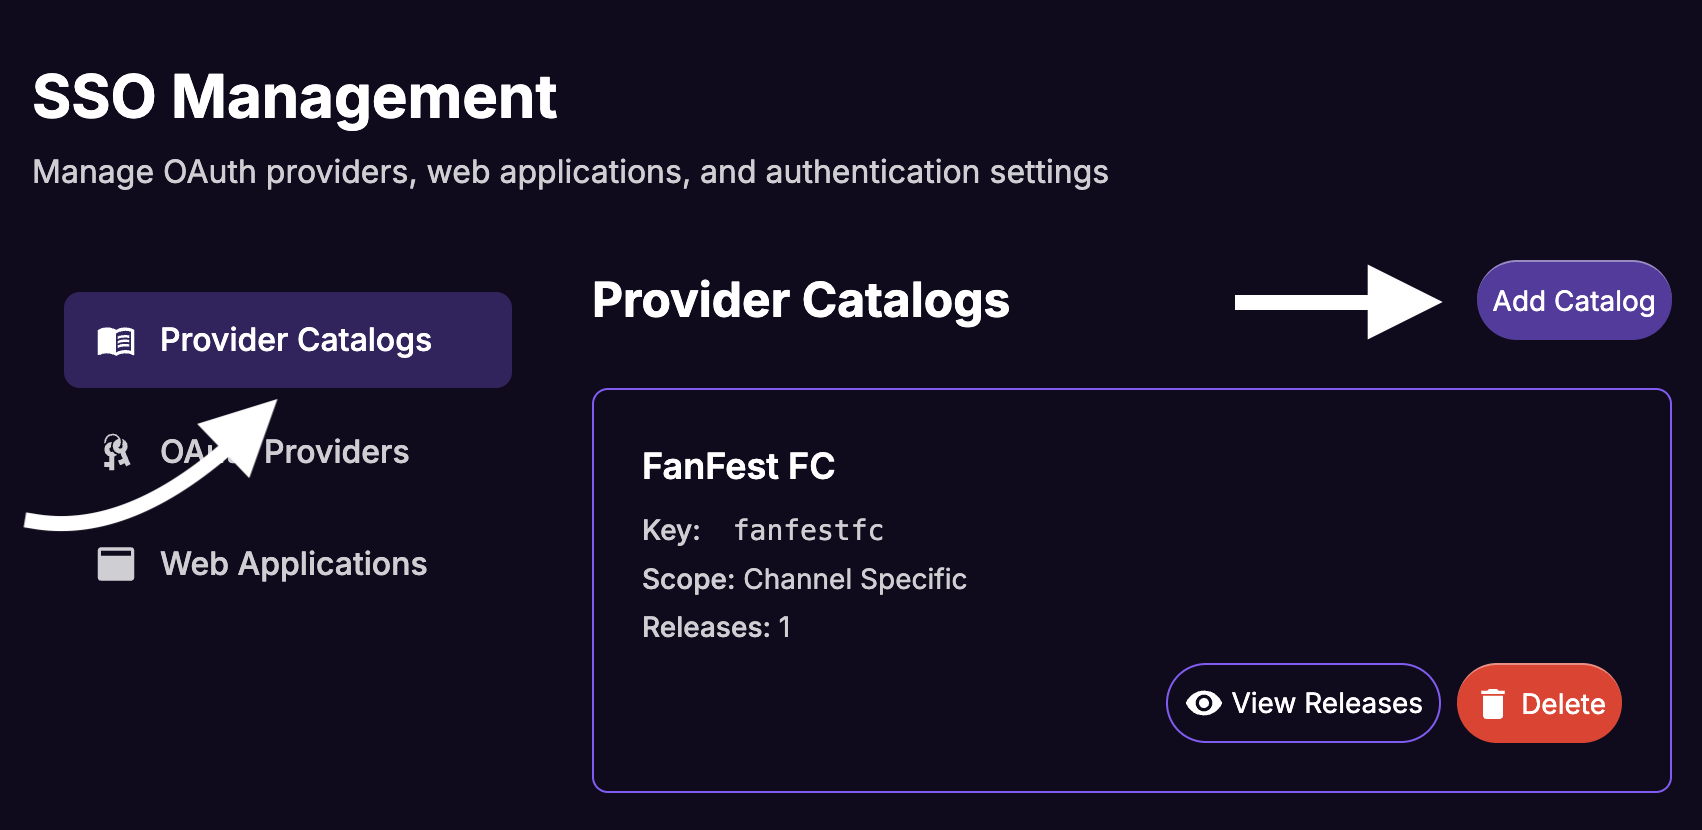
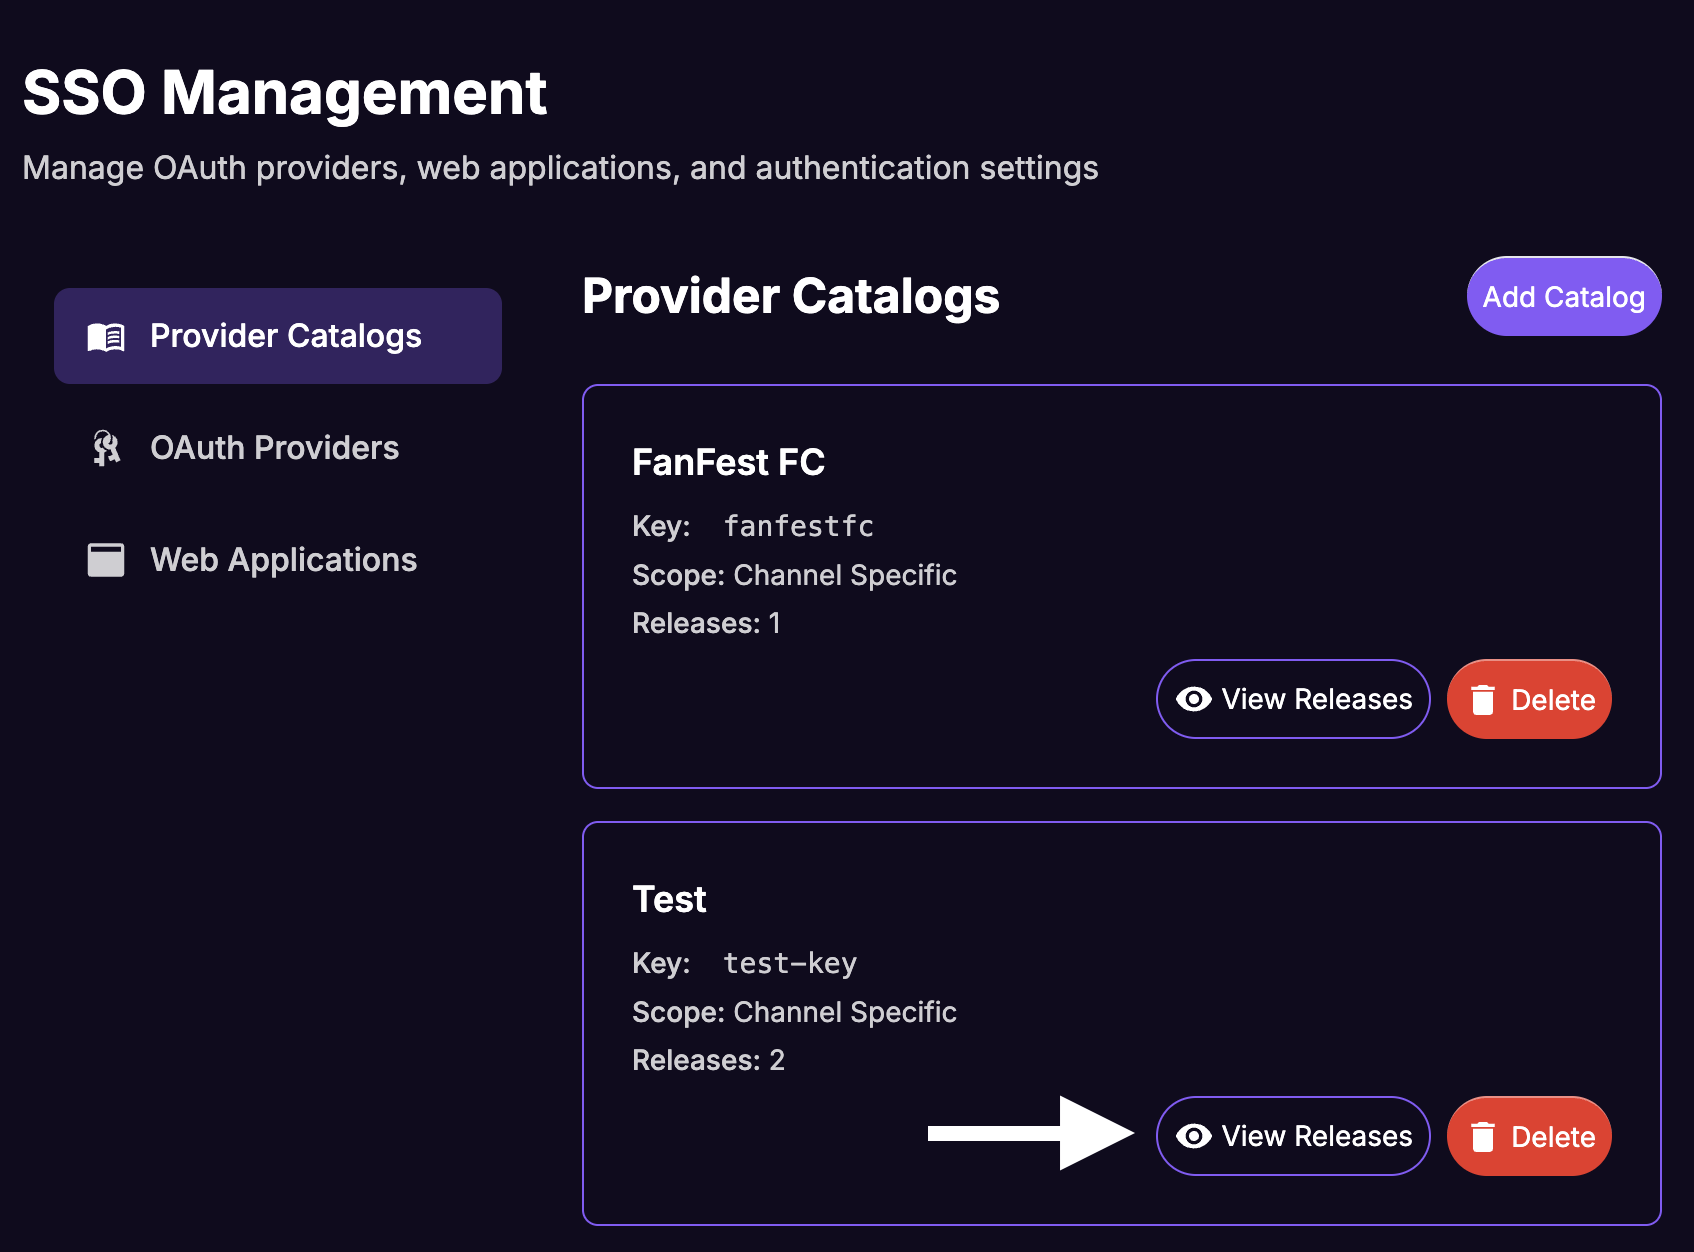
Create a Provider Catalog
A Provider Catalog is a container for your identity provider configuration. It allows you to version your provider settings over time.
Select Provider Catalogs on the sidebar and click Add Catalog.
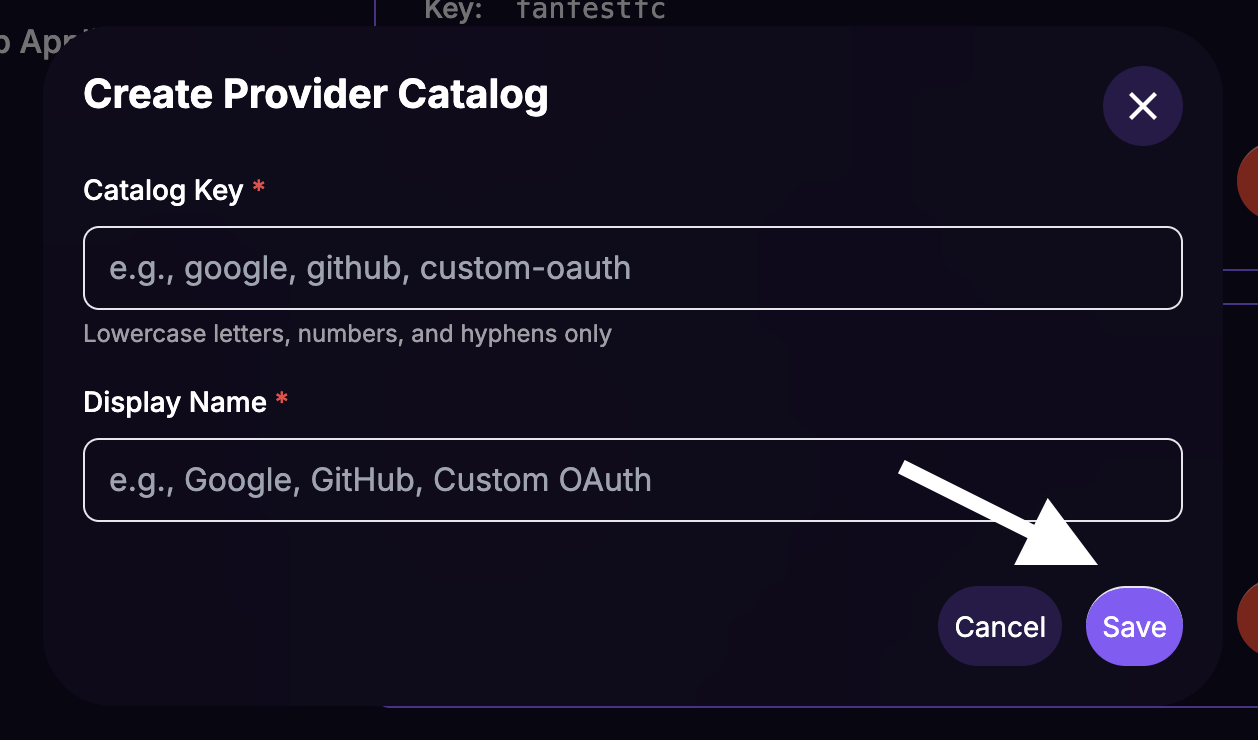
Fill in the Create Provider Catalog form:
- Catalog Key: A unique identifier using lowercase letters and hyphens (e.g.,
your-idp-catalog) - Display Name: A human-readable name for the dashboard (e.g.,
Your IdP Name)
- Catalog Key: A unique identifier using lowercase letters and hyphens (e.g.,
Click Save.
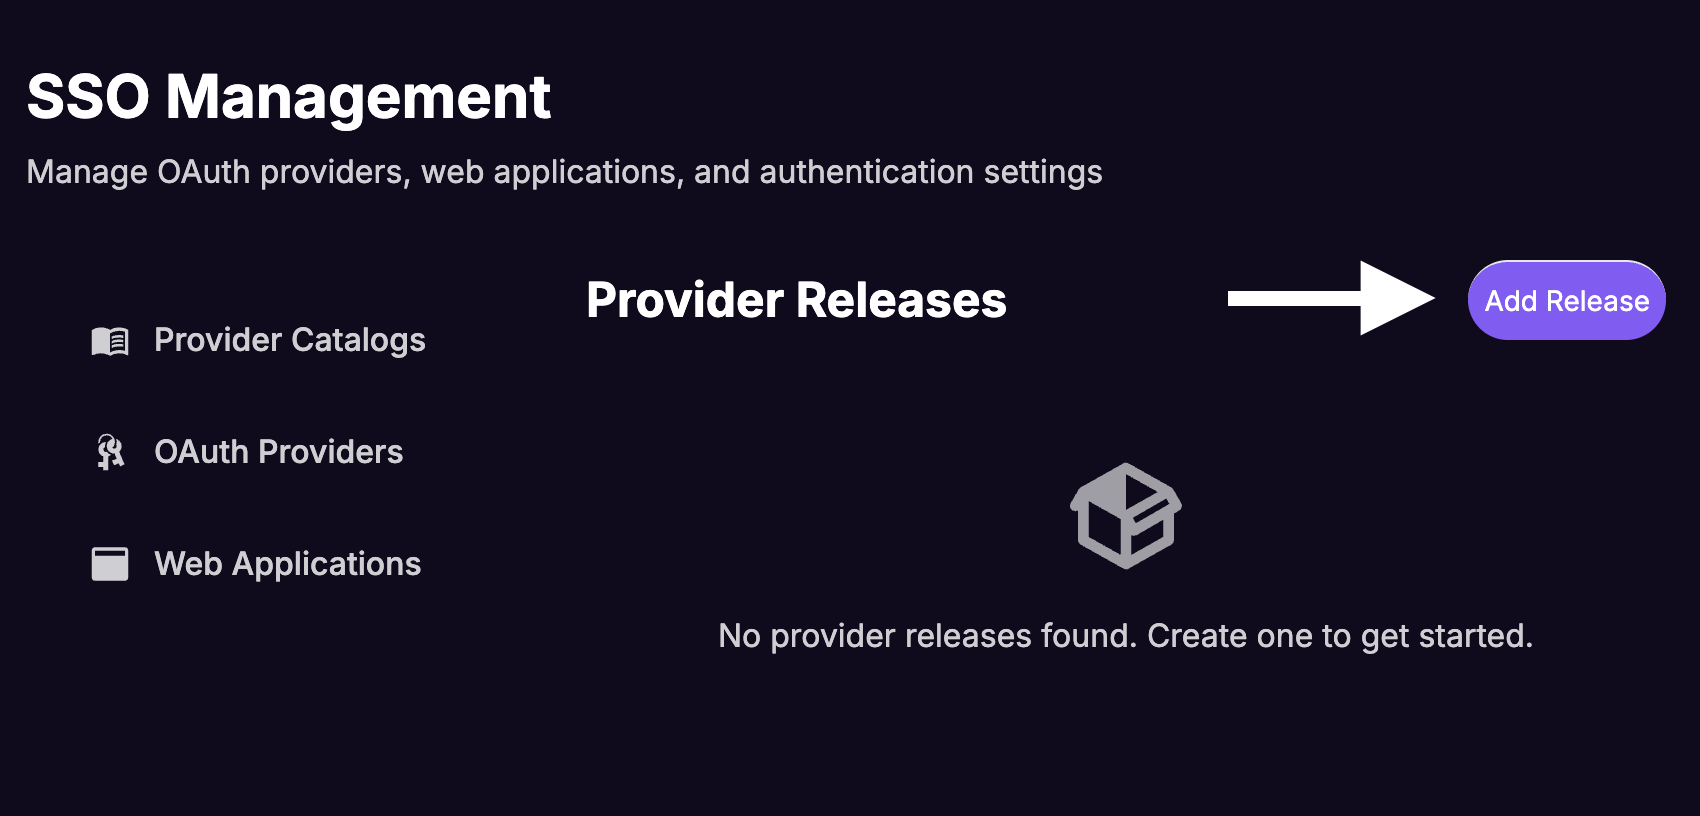
Create a Provider Release
A release contains the actual OIDC endpoints for your provider. Using releases allows you to update endpoints without recreating the entire configuration.
From the Catalogs list, click the View Releases button for your new catalog.
Click Add Release.
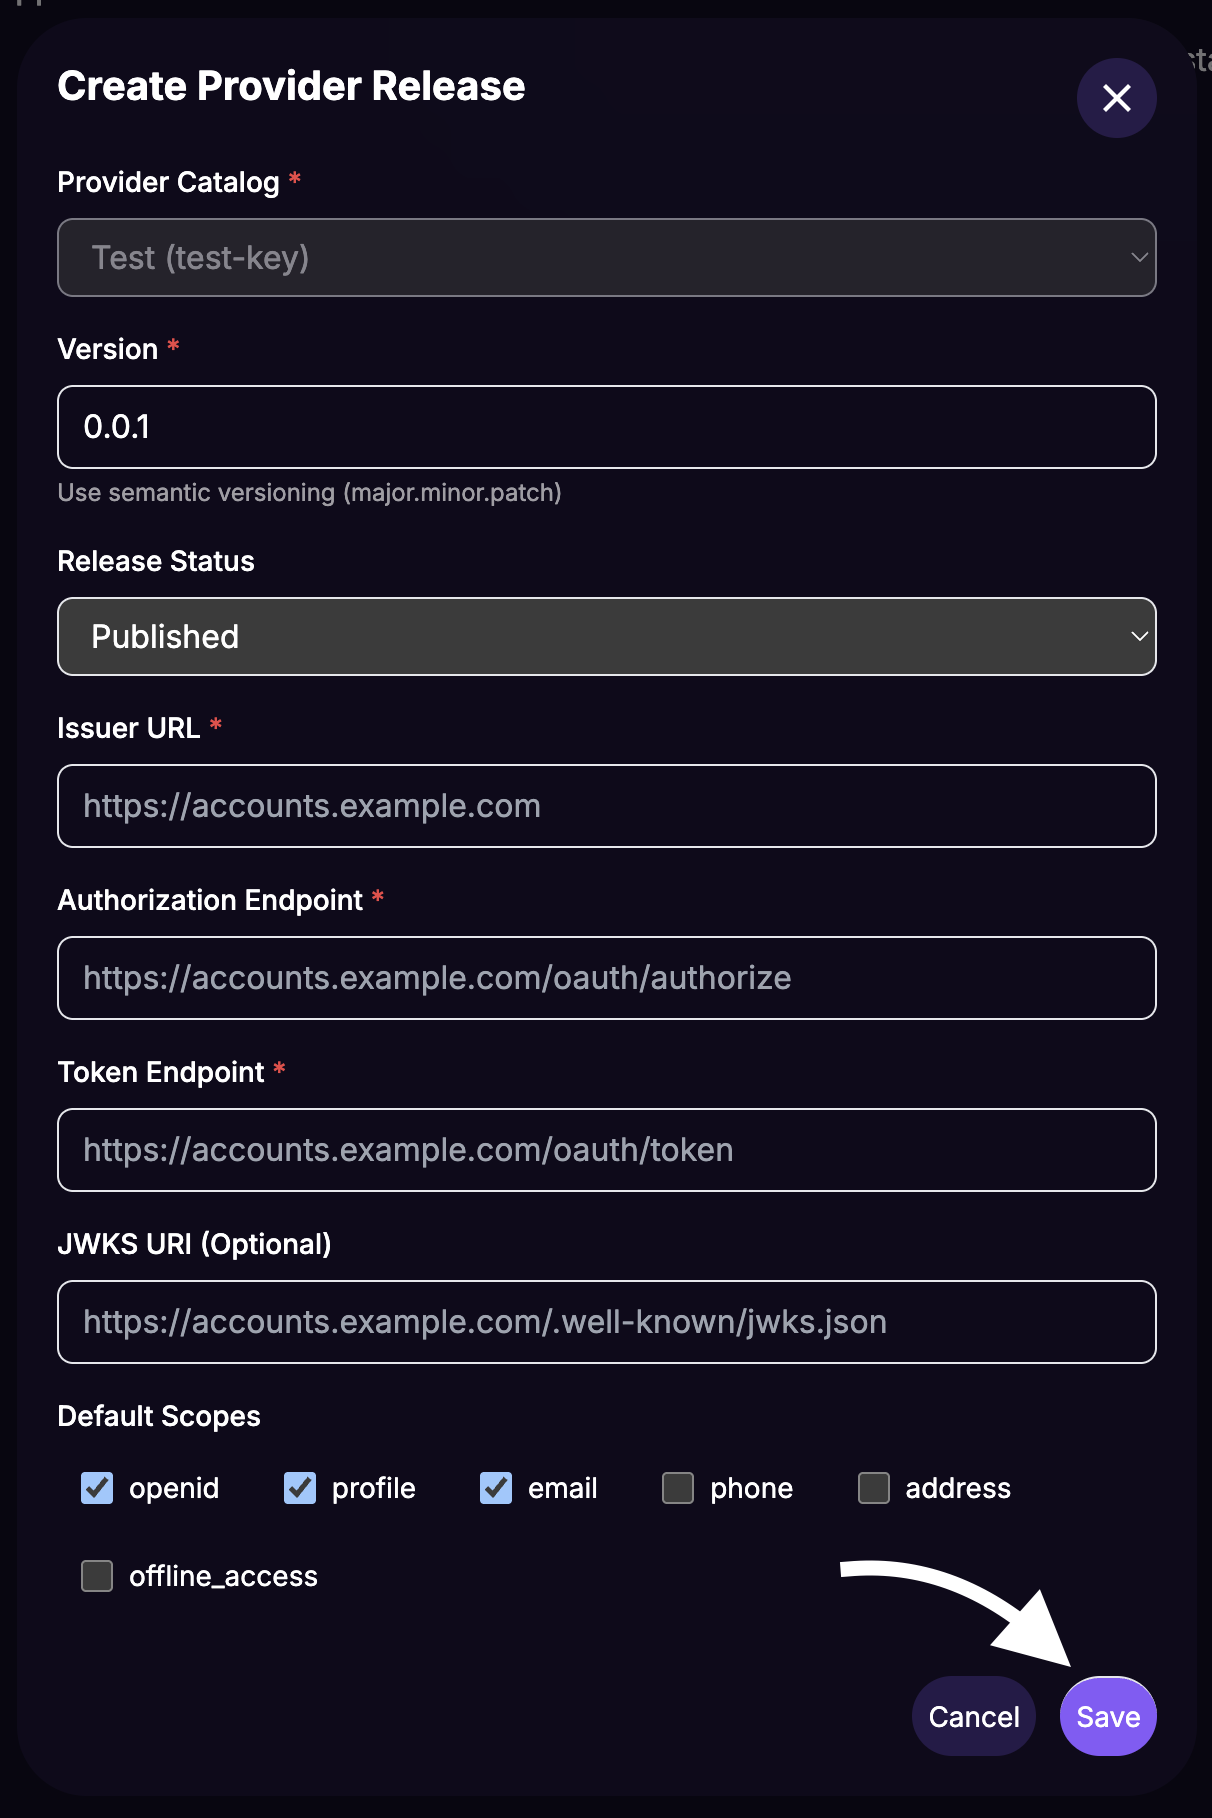
Fill in the Create Provider Release form:
- Version:
1.0.0(use semantic versioning) - Release Status: Select Published
- Issuer URL: The issuer URL from your identity provider
- Authorization Endpoint: The authorization endpoint from your provider
- Token Endpoint: The token endpoint from your provider
- Version:
Click Save.
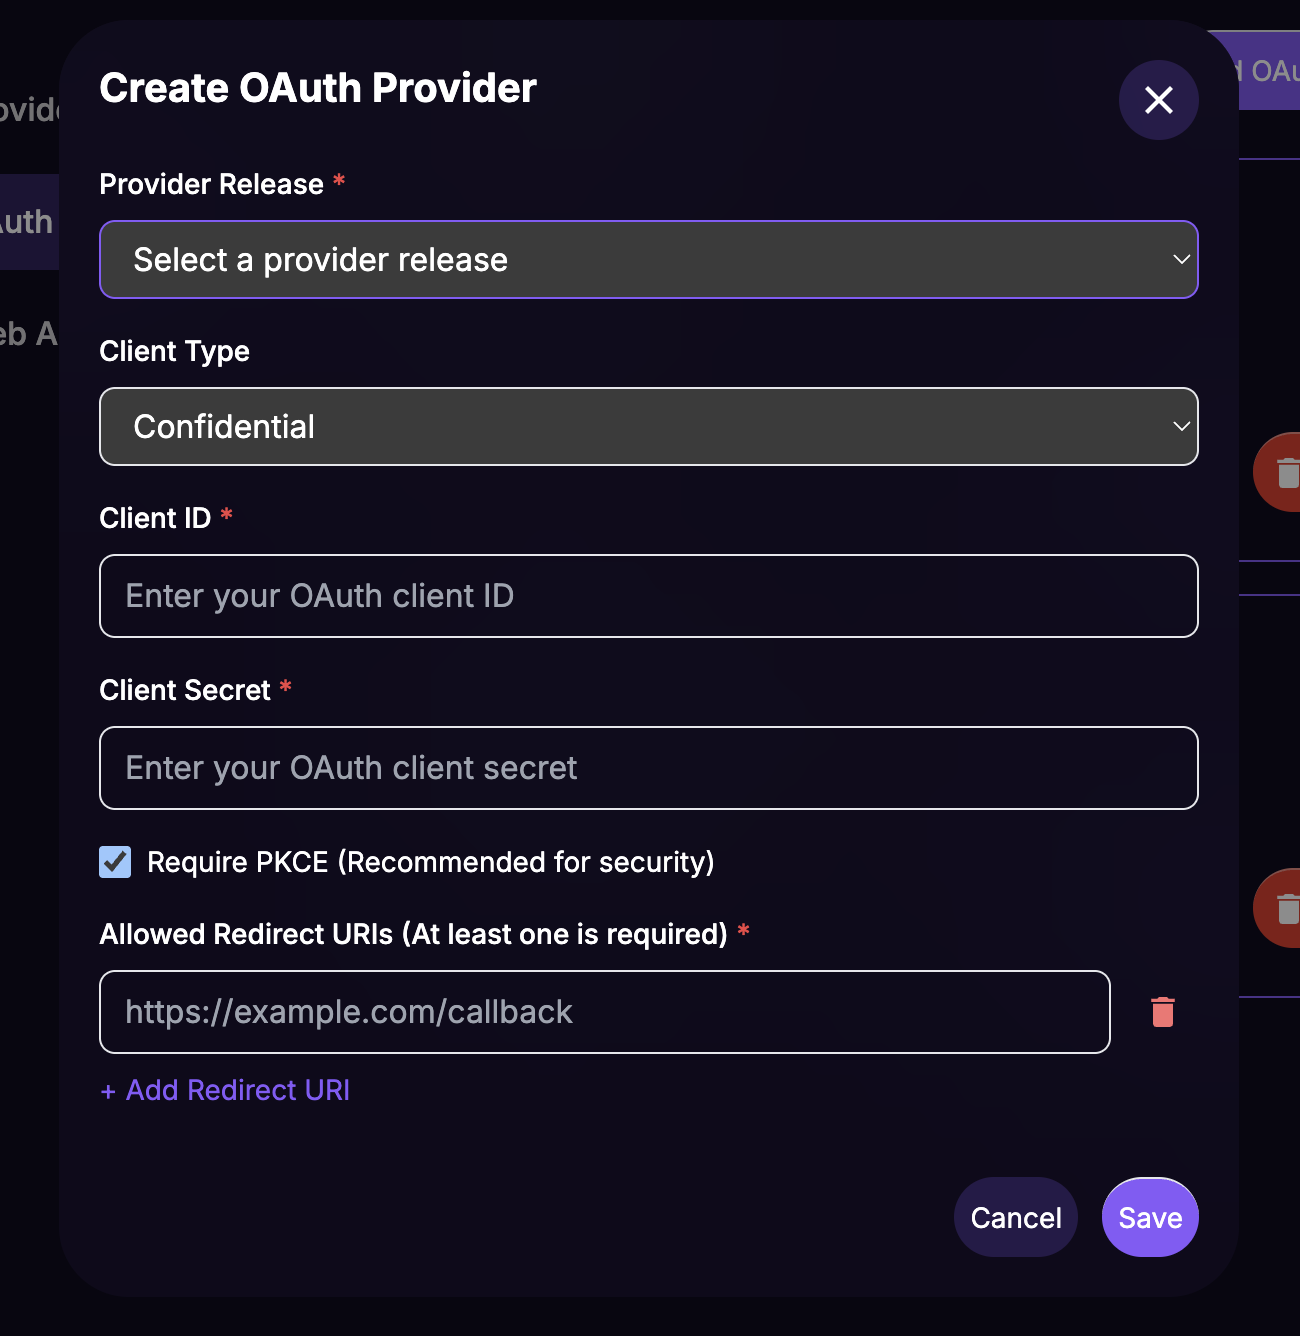
Create an OAuth Provider
The OAuth Provider links your provider release to the specific client credentials for FanFest.
From the SSO Management sidebar, select OAuth Providers and click Add OAuth Provider.

Fill in the Create OAuth Provider form:
- Provider Release: Select your release (e.g.,
Your IdP Name - v1.0.0 (published)) - Client ID: The Client ID from your identity provider application
- Client Secret: The Client Secret from your identity provider application
Where do I find the Client ID and Client Secret?
These values come from the application you created in your identity provider's dashboard in Step 1.
- Scopes:
openid profile email(required for user identification) - Allowed Redirect URIs: The URL of your website (must use
https://)
- Provider Release: Select your release (e.g.,
Click Save.
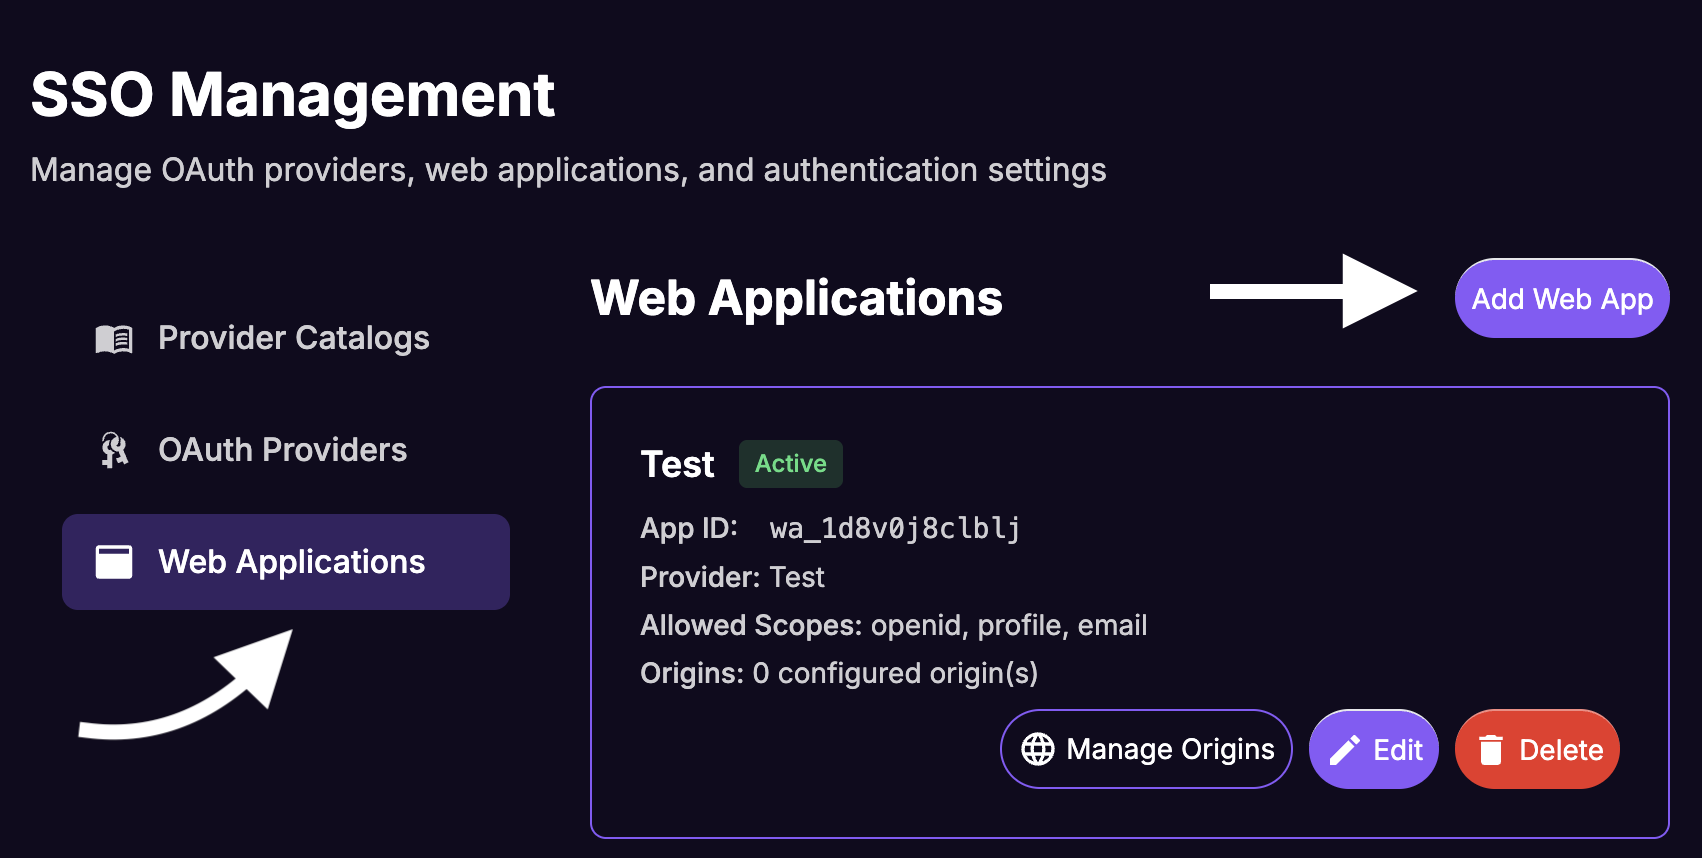
Create a Web App
A Web App ties the OAuth Provider to a specific website origin and generates the App ID (also called clientId) that you use in the SDK.
From the SSO Management sidebar, select Web Apps and click Add Web App.
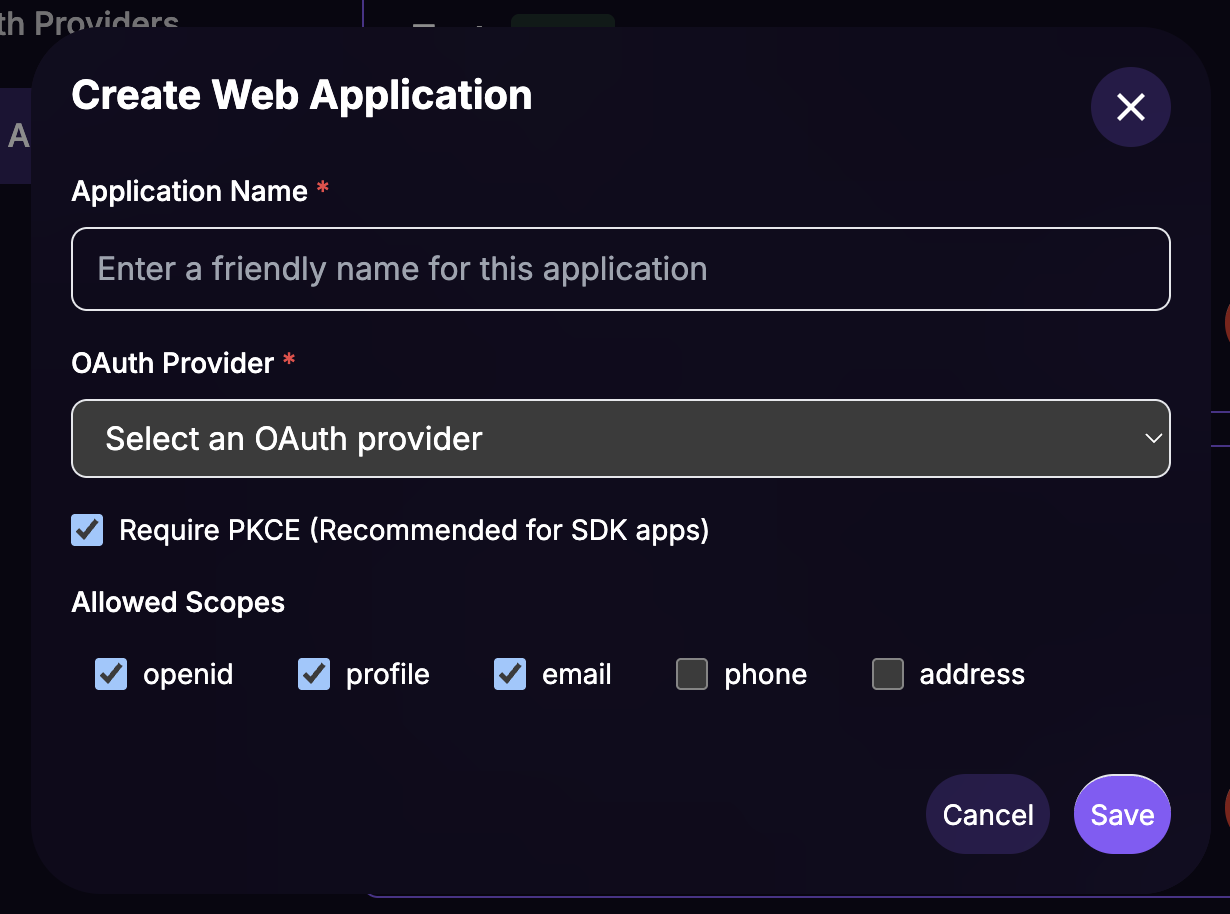
Fill in the Create Web App form:
- Application Name: A name for the dashboard (e.g.,
Your Website Web App) - OAuth Provider: Select the provider you just created
- Requires PKCE: Leave checked (recommended for security)
- Allowed Scopes:
openid profile email
- Application Name: A name for the dashboard (e.g.,
Click Save.
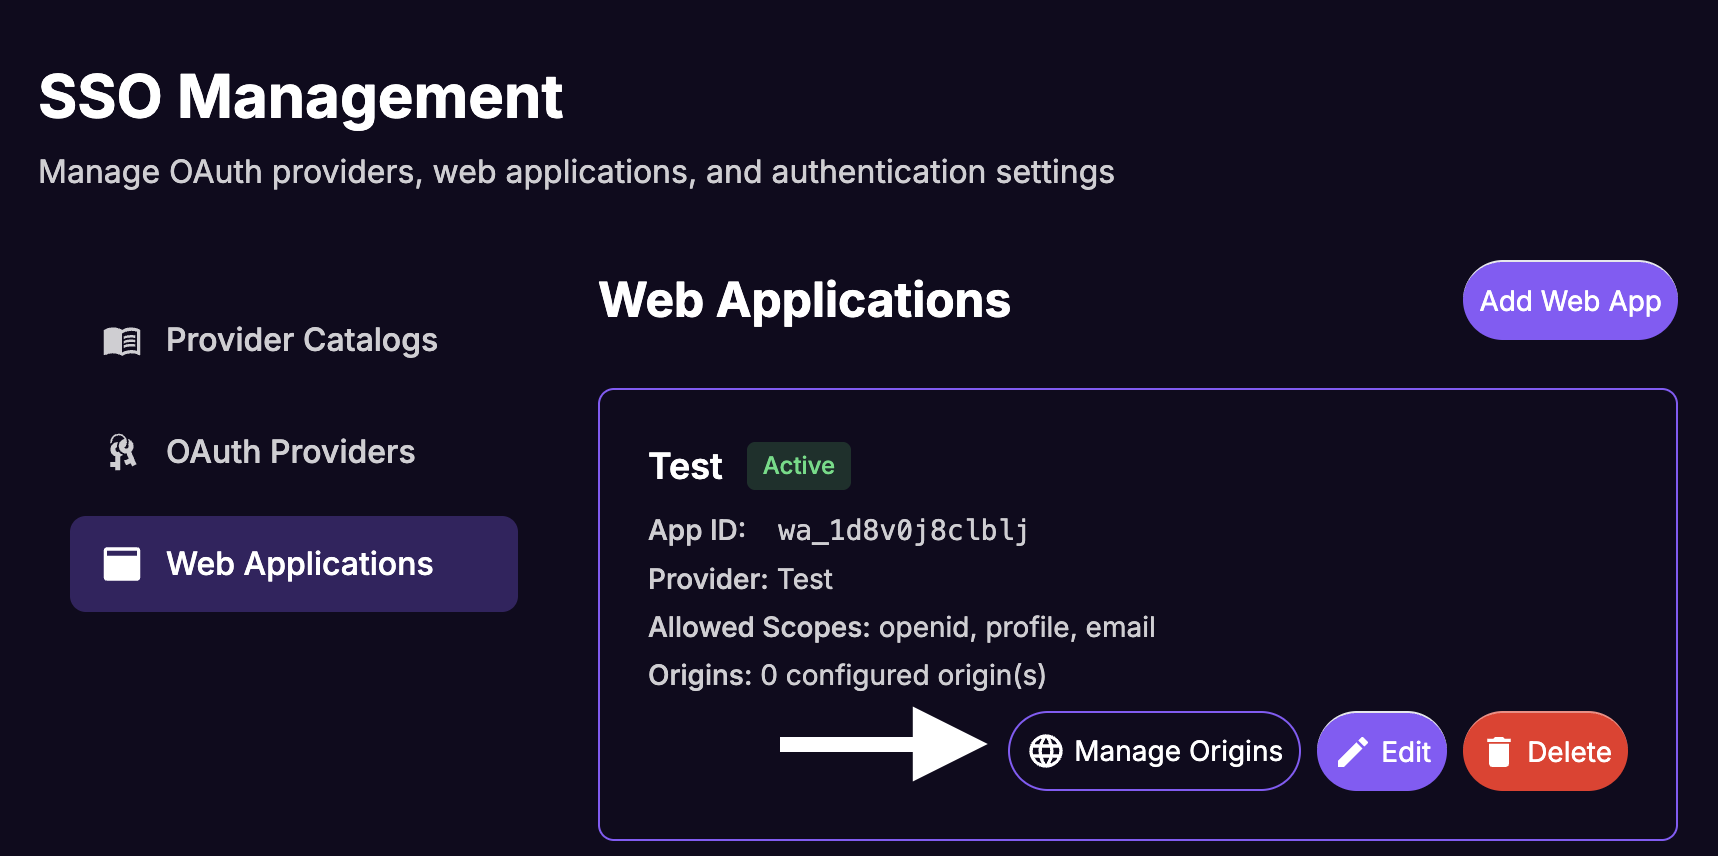
Configure Allowed Origins
Origins control which websites can use this Web App for authentication.
From the Web Apps list, click the Manage Origins button for your new web app.
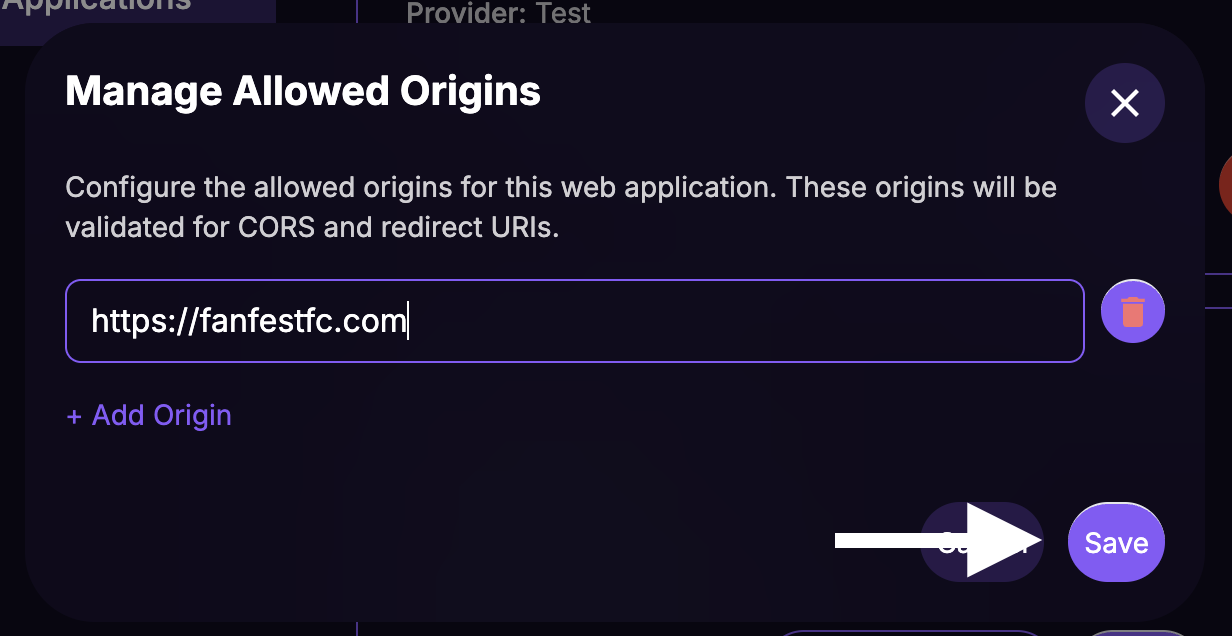
Paste the URL of your website.
Click Save.
Note Down the App ID
From the Web Apps list, note down the App ID for your new web app. This is the clientId you will use in the SDK configuration.
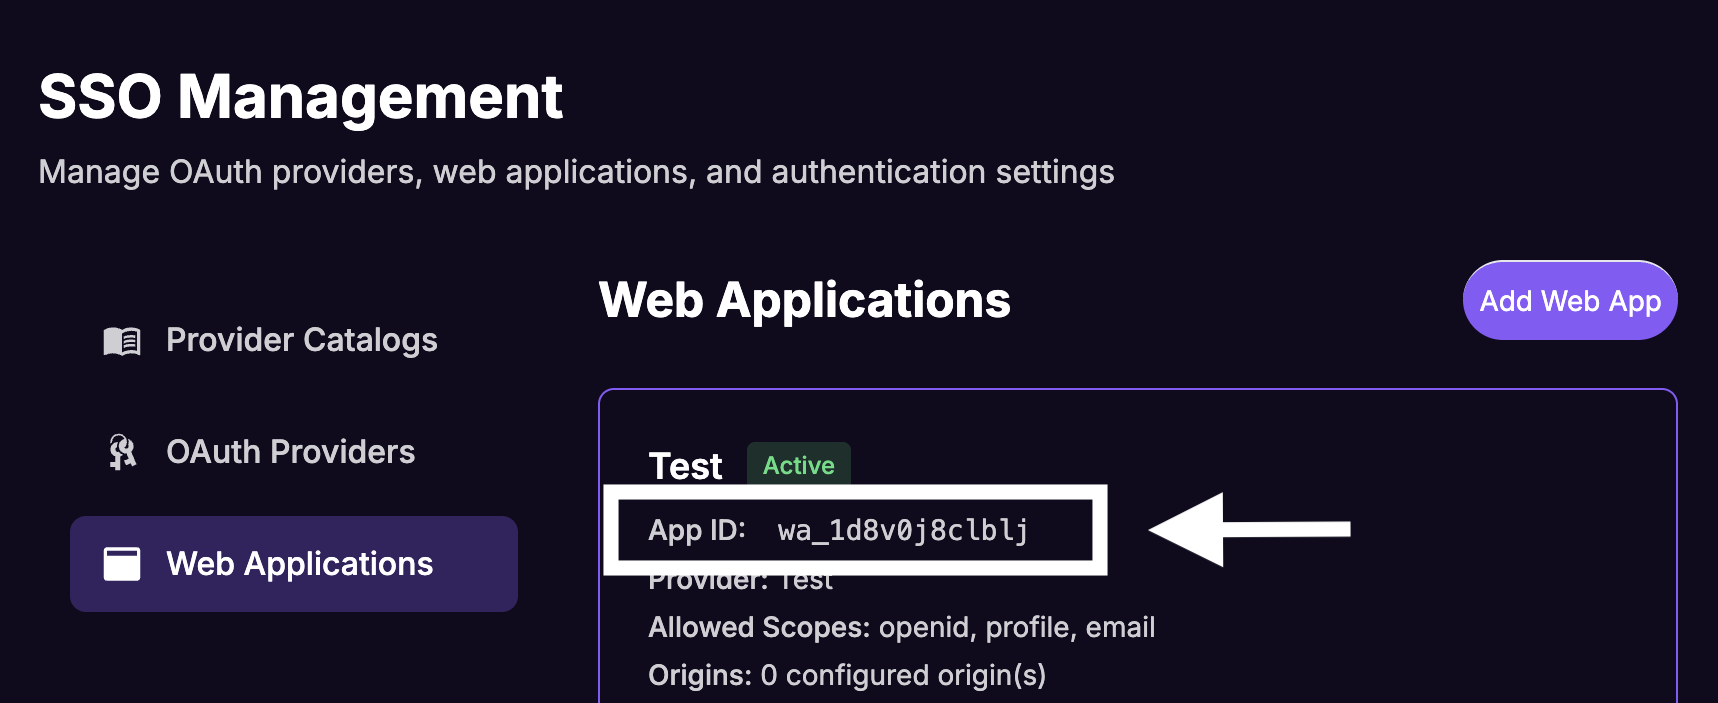
At this point, your identity provider and website are fully configured in the FanFest dashboard. You only need the App ID (Web App ID) to complete the integration.
Step 3: Integrate the FanFest SDK
Add the FanFest SDK to your website and configure it with SSO support. Replace YOUR_WEB_APP_ID with the App ID from the previous step.
<script
  type="text/javascript"
  src="https://sdk.production.fanfest.vip/1.0.20/fanfest-sdk.js"
></script>

<script type="text/javascript">
  window.addEventListener("load", function () {
    const FanFestSDK = window.FanFestSDK;

    FanFestSDK.init({
      clientId: "YOUR_WEB_APP_ID",
      hostLoginFn: () => {
        // Trigger the login flow of your website.
        // This is called when unauthenticated users try to claim rewards.
        // Example: window.AuthService.login();
      },
      hostRewardsFn: () => {
        // Navigate to your rewards page.
        // This is called when users want to view their rewards.
        // Example: router.push('/rewards');
      },
    });
  });
</script>
Notify the SDK of Login and Logout
The SDK needs to know when users log in or log out of your site so it can trigger the silent authentication flow.
// When the user logs in to your site
FanFestSDK.login();

// When the user logs out of your site
FanFestSDK.logout();
Why do I need to call login() and logout()?
The FanFest SDK needs to know the authentication state of your users to properly attribute rewards and points. By calling login() and logout(), you inform the SDK about the user's current state, allowing it to trigger the silent authentication flow with your identity provider as needed.
This ensures that users can seamlessly claim their rewards without having to log in again, providing a smooth user experience.
Do I need to pass any parameters?
No, both login() and logout() methods do not require any parameters. They notify the FanFest SDK about the user's authentication state change and allow it to handle the necessary processes internally.
login()triggers the OIDC silent authentication flow via a hidden iframelogout()clears the stored authentication state fromlocalStorage
Step 4: Test the Integration
- Open your website in a browser.
- Log in using your site's normal login flow.
- Verify that the FanFest embed recognizes the user (you should see personalized content and the ability to claim rewards).
- Log out and verify that the user returns to anonymous mode.
- Log in again and verify that the user is recognized immediately (the auth state persists in
localStorage).
Debugging
Open your browser's developer tools and check the console for FanFest SDK log messages. Look for:
Initiating silent authentication— the SDK is starting the OIDC flowValidated authentication— the flow completed successfully- Any error messages indicating misconfiguration
Continue
- Learn how user identification works — understand the silent auth iframe flow and privacy considerations
- Set up event tracking — start tracking user engagement and rewarding your users
- See the Auth0 example — a complete Auth0 walkthrough with working code
Appendix: Legacy SSO Integration Patterns
This appendix covers additional SSO integration patterns for various platforms and frameworks.
What the SDK Needs
The SDK requires minimal user information. The OIDC scopes openid profile email provide:
- User ID — Unique identifier from your system (OIDC
subclaim) - Email — For reward notifications (OIDC
emailscope) - Username — For display in leaderboards (OIDC
profilescope)
Nuxt.js OIDC Configuration
export default defineNuxtConfig({
  runtimeConfig: {
    auth: {
      oidc: {
        session: {
          name: "fanfestfc-oidc",
          password: process.env.NUXT_OIDC_AUTH_SESSION_SECRET,
          maxAge: 60 * 60 * 24 * 30, // 30 days
          secure: process.env.NODE_ENV === "production",
          sameSite: "lax",
        },
      },
      auth0: {
        clientId: process.env.NUXT_OIDC_PROVIDERS_AUTH0_CLIENT_ID,
        clientSecret: process.env.NUXT_OIDC_PROVIDERS_AUTH0_CLIENT_SECRET,
        baseUrl: process.env.NUXT_OIDC_PROVIDERS_AUTH0_BASE_URL,
      },
    },
    public: {
      apiUrl: process.env.API_URL,
      appOrigin: process.env.APP_ORIGIN ?? "https://fanfest.vip",
    },
  },
});
Keycloak Integration
FanFestSDK.init({
  clientId: "your-client-id",
  hostLoginFn: () => {
    // Redirect to Keycloak login
    keycloak.login();
  },
});

// After Keycloak authentication completes
if (keycloak.authenticated) {
  FanFestSDK.login();
}
Generic OIDC Integration
FanFestSDK.init({
  clientId: "your-client-id",
  hostLoginFn: () => {
    // Trigger your OIDC provider's login flow
    oidcClient.signinRedirect();
  },
});

// After OIDC callback completes
oidcClient.signinRedirectCallback().then(() => {
  FanFestSDK.login();
});
WordPress Integration
<?php // In your WordPress theme's footer.php ?>
<script type="text/javascript">
  window.addEventListener("load", function () {
    const FanFestSDK = window.FanFestSDK;

    FanFestSDK.init({
      clientId: "YOUR_WEB_APP_ID",
      hostLoginFn: () => {
        window.location.href = "<?php echo wp_login_url(get_permalink()); ?>";
      },
    });

    <?php if (is_user_logged_in()): ?>
    FanFestSDK.login();
    <?php endif; ?>
  });
</script>
Complete Integration with Action Mapping
const engagementActionToChannelActionId: Record<EngagementAction, string> = {
  [EngagementAction.PURCHASED_ITEM]: "fanfestfc_PURCHASED_ITEM",
  [EngagementAction.PODCAST_COMPLETE]: "fanfestfc_PODCAST_COMPLETE",
  [EngagementAction.BROWSED_TICKETS]: "fanfestfc_BROWSED_TICKETS",
  // ... more actions
};

FanFestSDK.registerActionMapping(engagementActionToChannelActionId);

FanFestSDK.init({
  clientId: "fanfestfc",
  apiBase: "https://api.fanfest.vip",
  appOrigin: "https://fanfest.vip",
  iframe: {
    backgroundColor: "var(--color-brand-950)",
  },
  hostLoginFn: () => {
    authStore.login();
  },
  hostRewardsFn: () => {
    router.push("/rewards");
  },
});

// After your auth system confirms login
authStore.onLogin(() => {
  FanFestSDK.login();
});

authStore.onLogout(() => {
  FanFestSDK.logout();
});
Error Handling
FanFestSDK.init({
  clientId: "your-client-id",
  hostLoginFn: () => {
    try {
      yourAuthService.login();
    } catch (error) {
      console.warn("Login flow failed:", error);
      // The SDK continues in anonymous mode
    }
  },
});
Security Best Practices
- The FanFest Web App ID (
clientId) is origin-scoped and safe for client-side use - PKCE is enabled by default for all Web Apps — do not disable it
- Avoid including PII in event metadata — use opaque identifiers instead
- Store identity provider tokens securely (httpOnly cookies, secure localStorage)
- Implement token refresh for long-lived sessions on your site