SSO Integration - Quickstart #1
This guide walks you through integrating Single Sign-On (SSO) for your website using the FanFest Platform and your identity provider (IdP).
FanFest follows the OIDC silent authentication flow to securely authenticate users without disrupting their experience.
Step 1: Register FanFest with Your Identity Provider
For this, you'll need to create a new application/client for the FanFest integration.
- Set the application type to "Regular Web Application" or equivalent.
- Configure the redirect URIs to include FanFest's Identity Platform callback URL:
plaintexthttps://6c8kp9bzu6.execute-api.eu-west-1.amazonaws.com/staging/auth/callbackNote down the following details from your IdP after creating the application:
- Client ID
- Client Secret
Identify the Issuer URL, Authorization Endpoint and Token Endpoint from your IdP's documentation.
See an Example Auth0 Configuration
Log in to your Auth0 dashboard.
Navigate to the "Applications" section and click on "Create Application".
- Select "Regular Web Application" as the application type.
Navigate to "Settings" tab of your newly created application.
Set the following fields:
Allowed Callback URLs:
plaintexthttps://6c8kp9bzu6.execute-api.eu-west-1.amazonaws.com/staging/auth/callbackSave changes.
Note down the Domain, Client ID and Client Secret from the application settings
We'll use the Domain to derive the endpoints as follows:
| Endpoint | URL Format |
|---|---|
| Issuer URL | https://<YOUR_AUTH0_DOMAIN>/ |
| Authorization Endpoint | https://<YOUR_AUTH0_DOMAIN>/oauth/authorize |
| Token Endpoint | https://<YOUR_AUTH0_DOMAIN>/oauth/token |
At this point, you should have the following details ready
- IdP general information:
- Issuer URL
- Authorization Endpoint
- Token Endpoint
- FanFest application credentials from your IdP:
- Client ID
- Client Secret
Step 2: Configure Your Identity Provider in FanFest Dashboard
Log in to your FanFest account.
Open the channel admin tooltip.
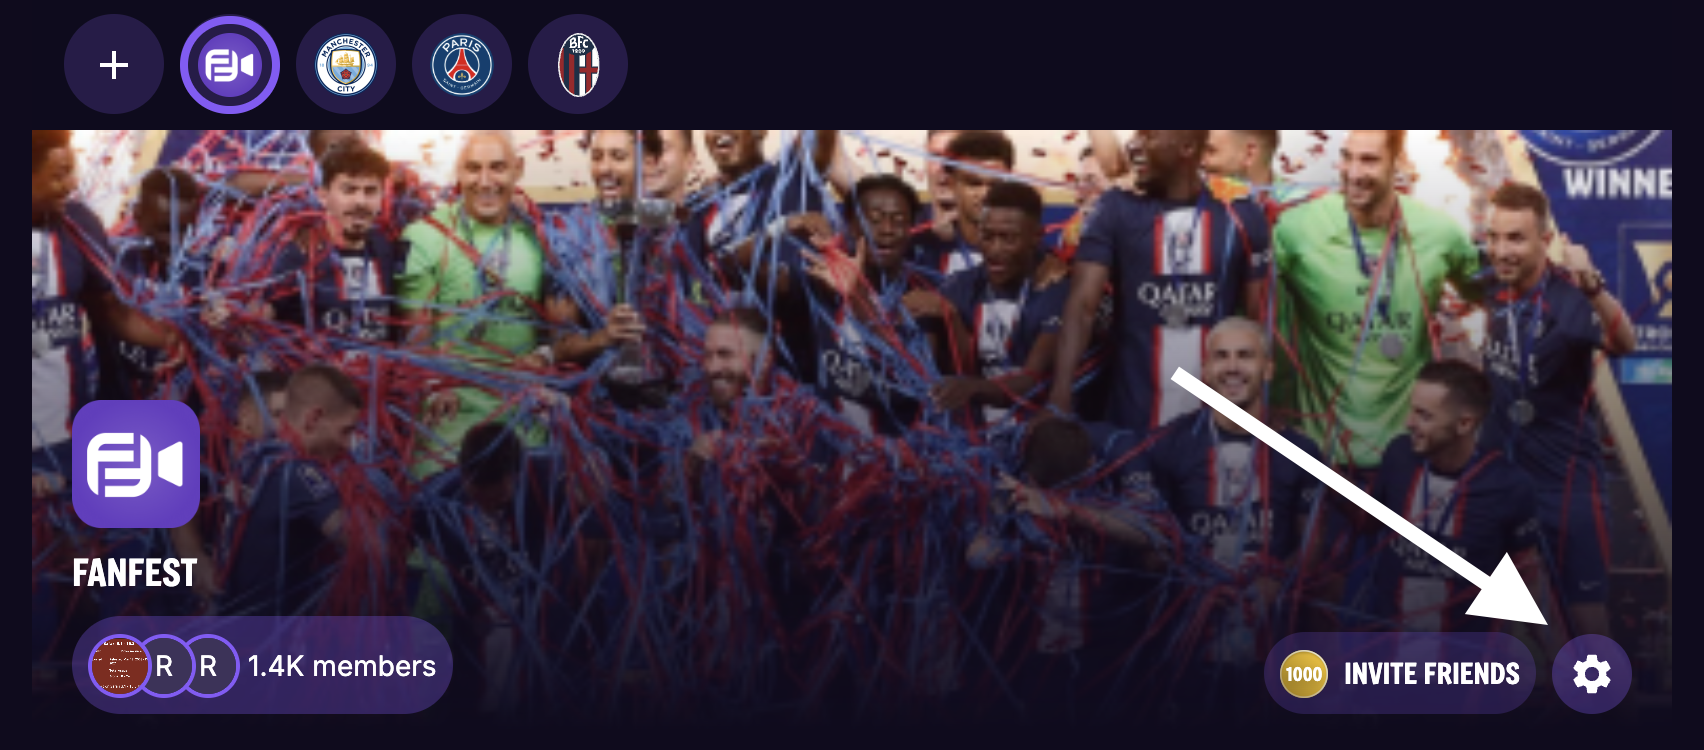
Navigate to
SSO Management.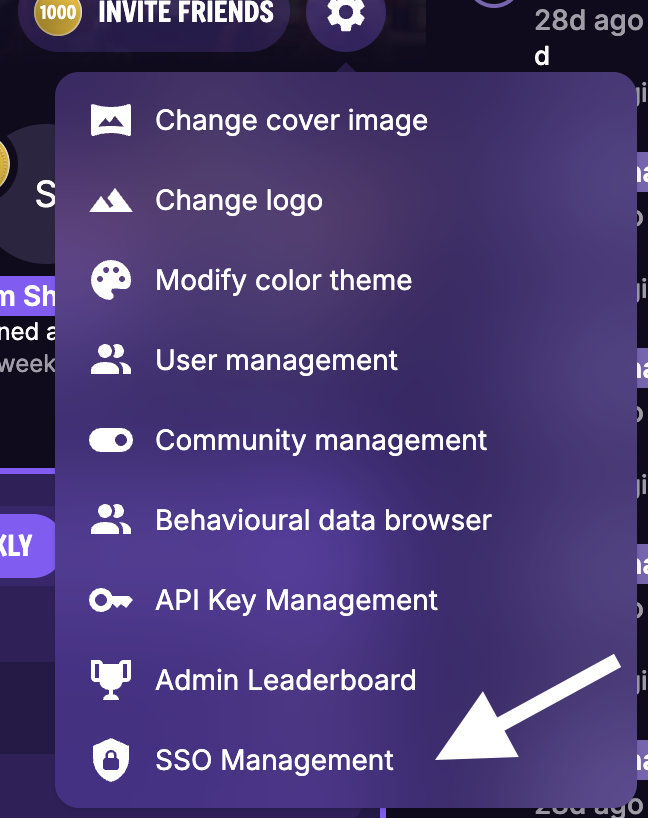
Select
Provider Catalogson the sidebar and click onAdd Catalog.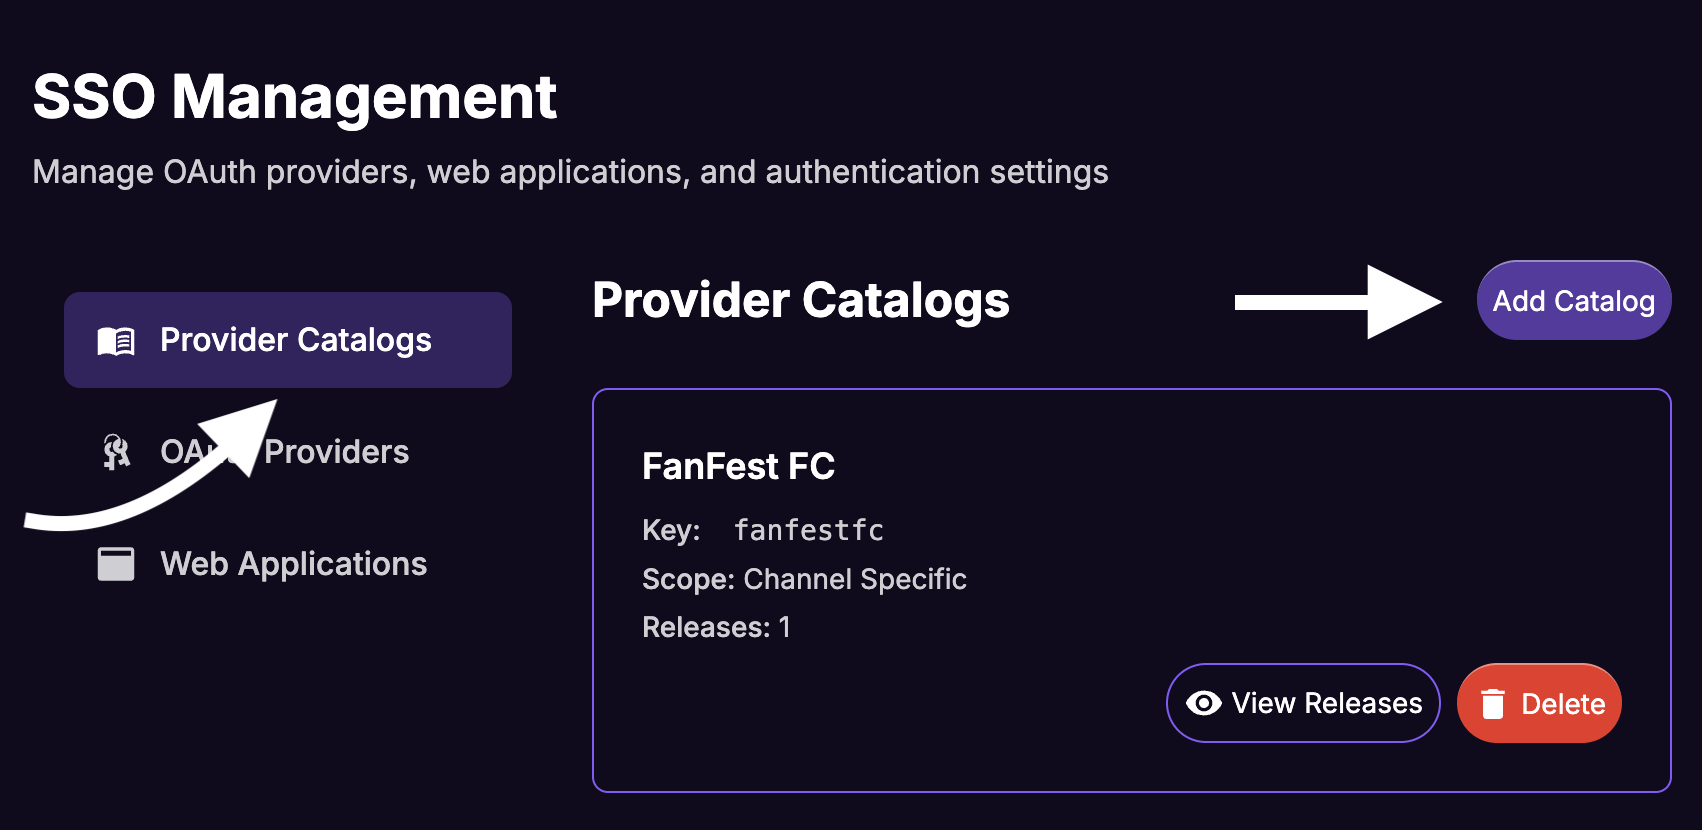
Fill in the data in the
Create Provider Catalogmodal' form:- Catalog Key:
your-idp-catalog(this is a unique identifier, follow the naming convention of using lowercase letters and hyphens). - Display Name:
Your IdP Name(this is a user friendly name for the dashboard, not show to users). - Click on
Save.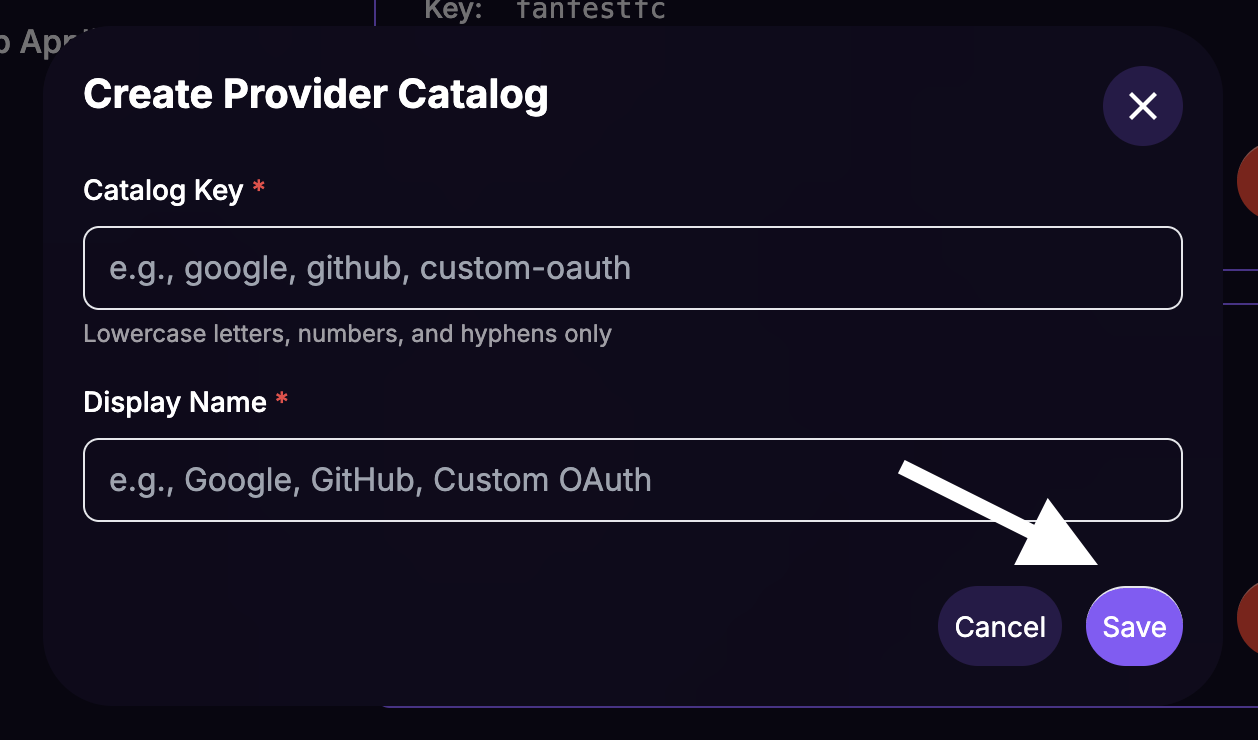
- Catalog Key:
From the Catalogs list, click on the
View Releasesbutton for the newly created catalog.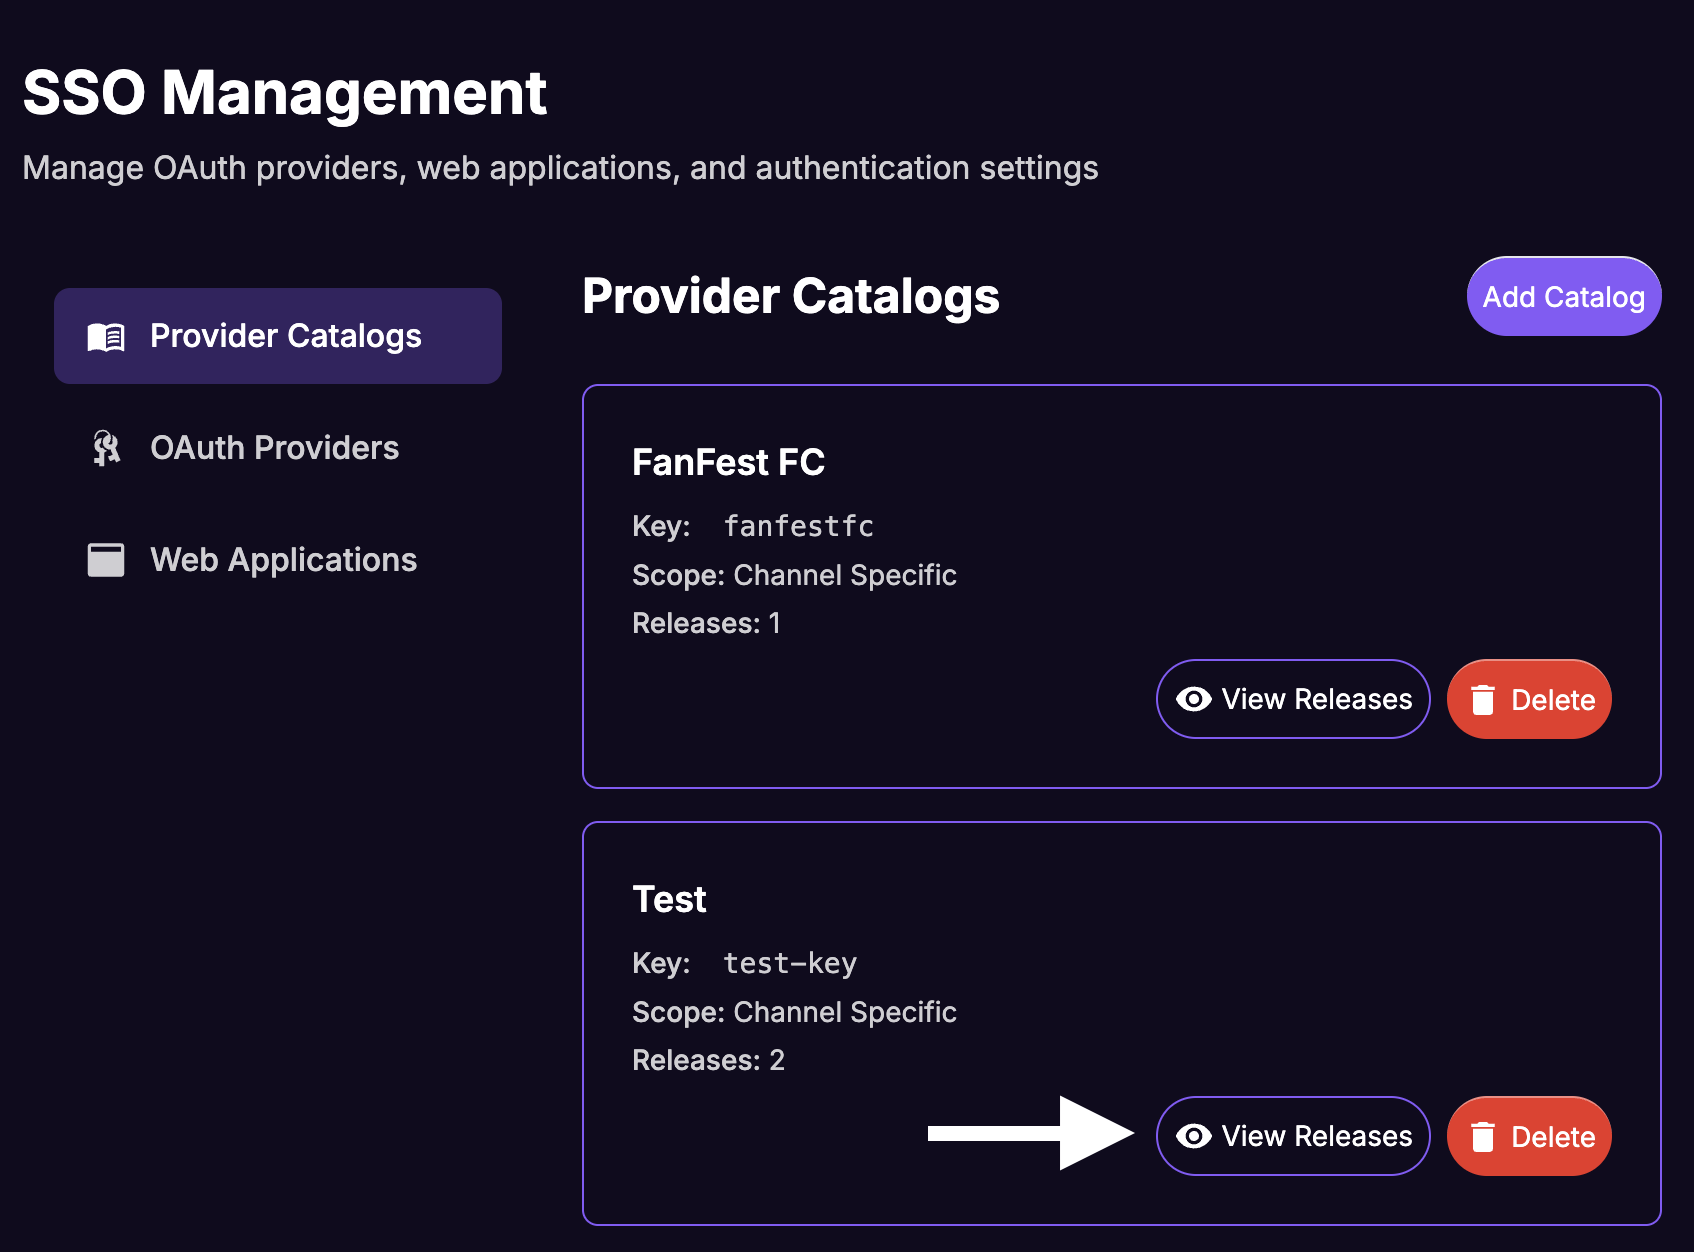
Click on
Add Release.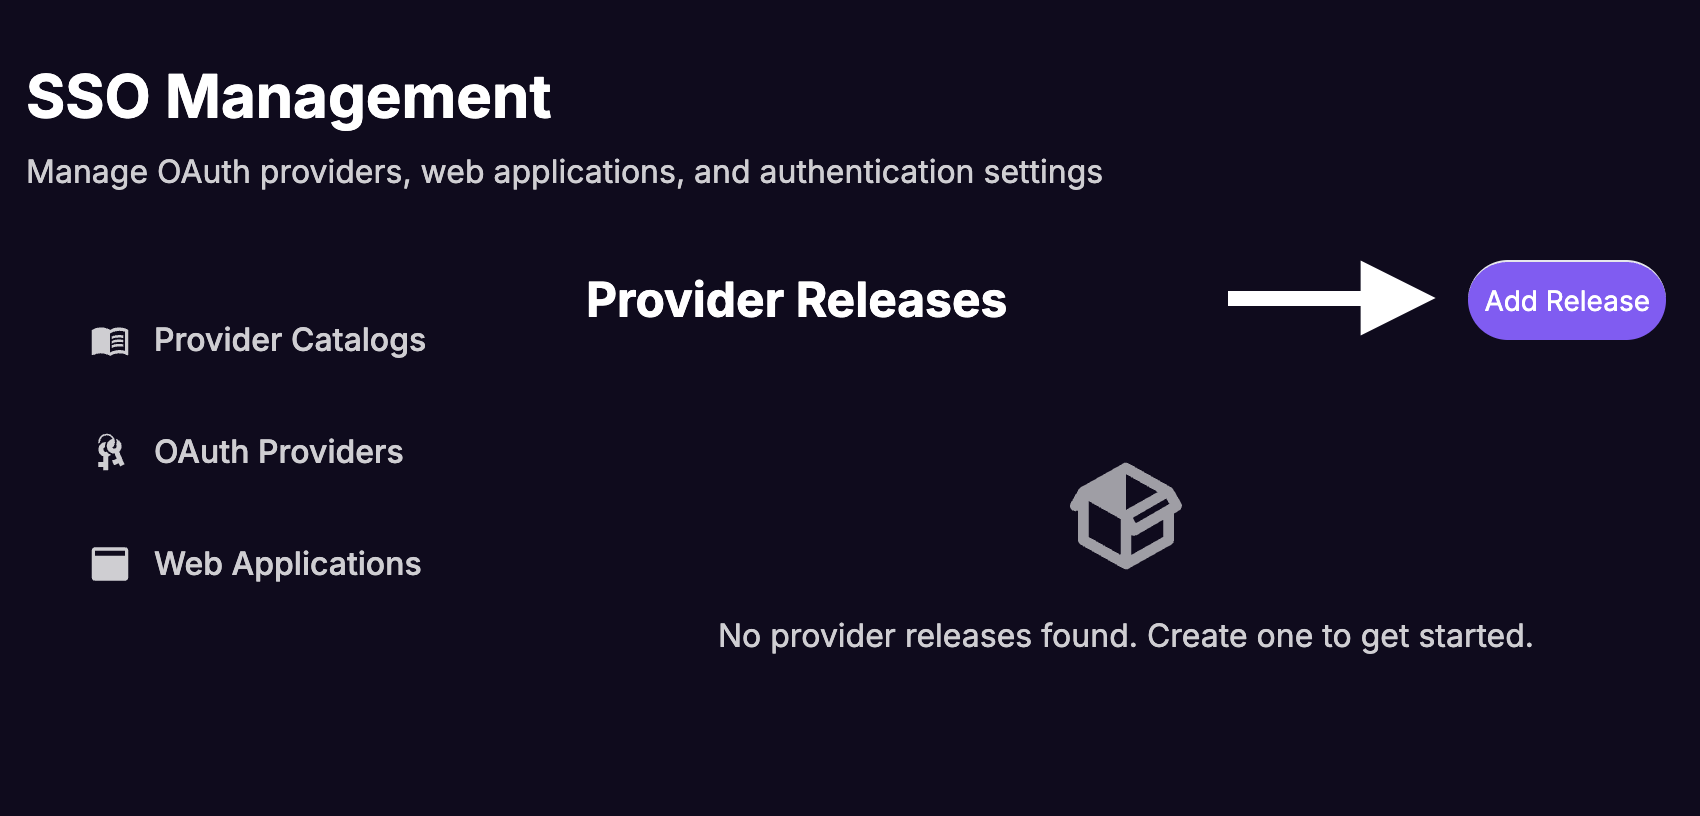
Fill in the data in the
Create Provider Releasemodal' form:Version:
1.0.0(use Semantical versioning).Release Status: Select
Published.Fill in Issuer URL, Authorization Endpoint and Token Endpoint with the values from your IdP.
Where do I find these values?
You'll need to refer to your IdP's documentation or dashboard to find the correct URLs for your application. They're generic for OIDC-compliant providers.
Go back to the Register FanFest with Your Identity Provider step for details on how to get these values.
Click on
Save.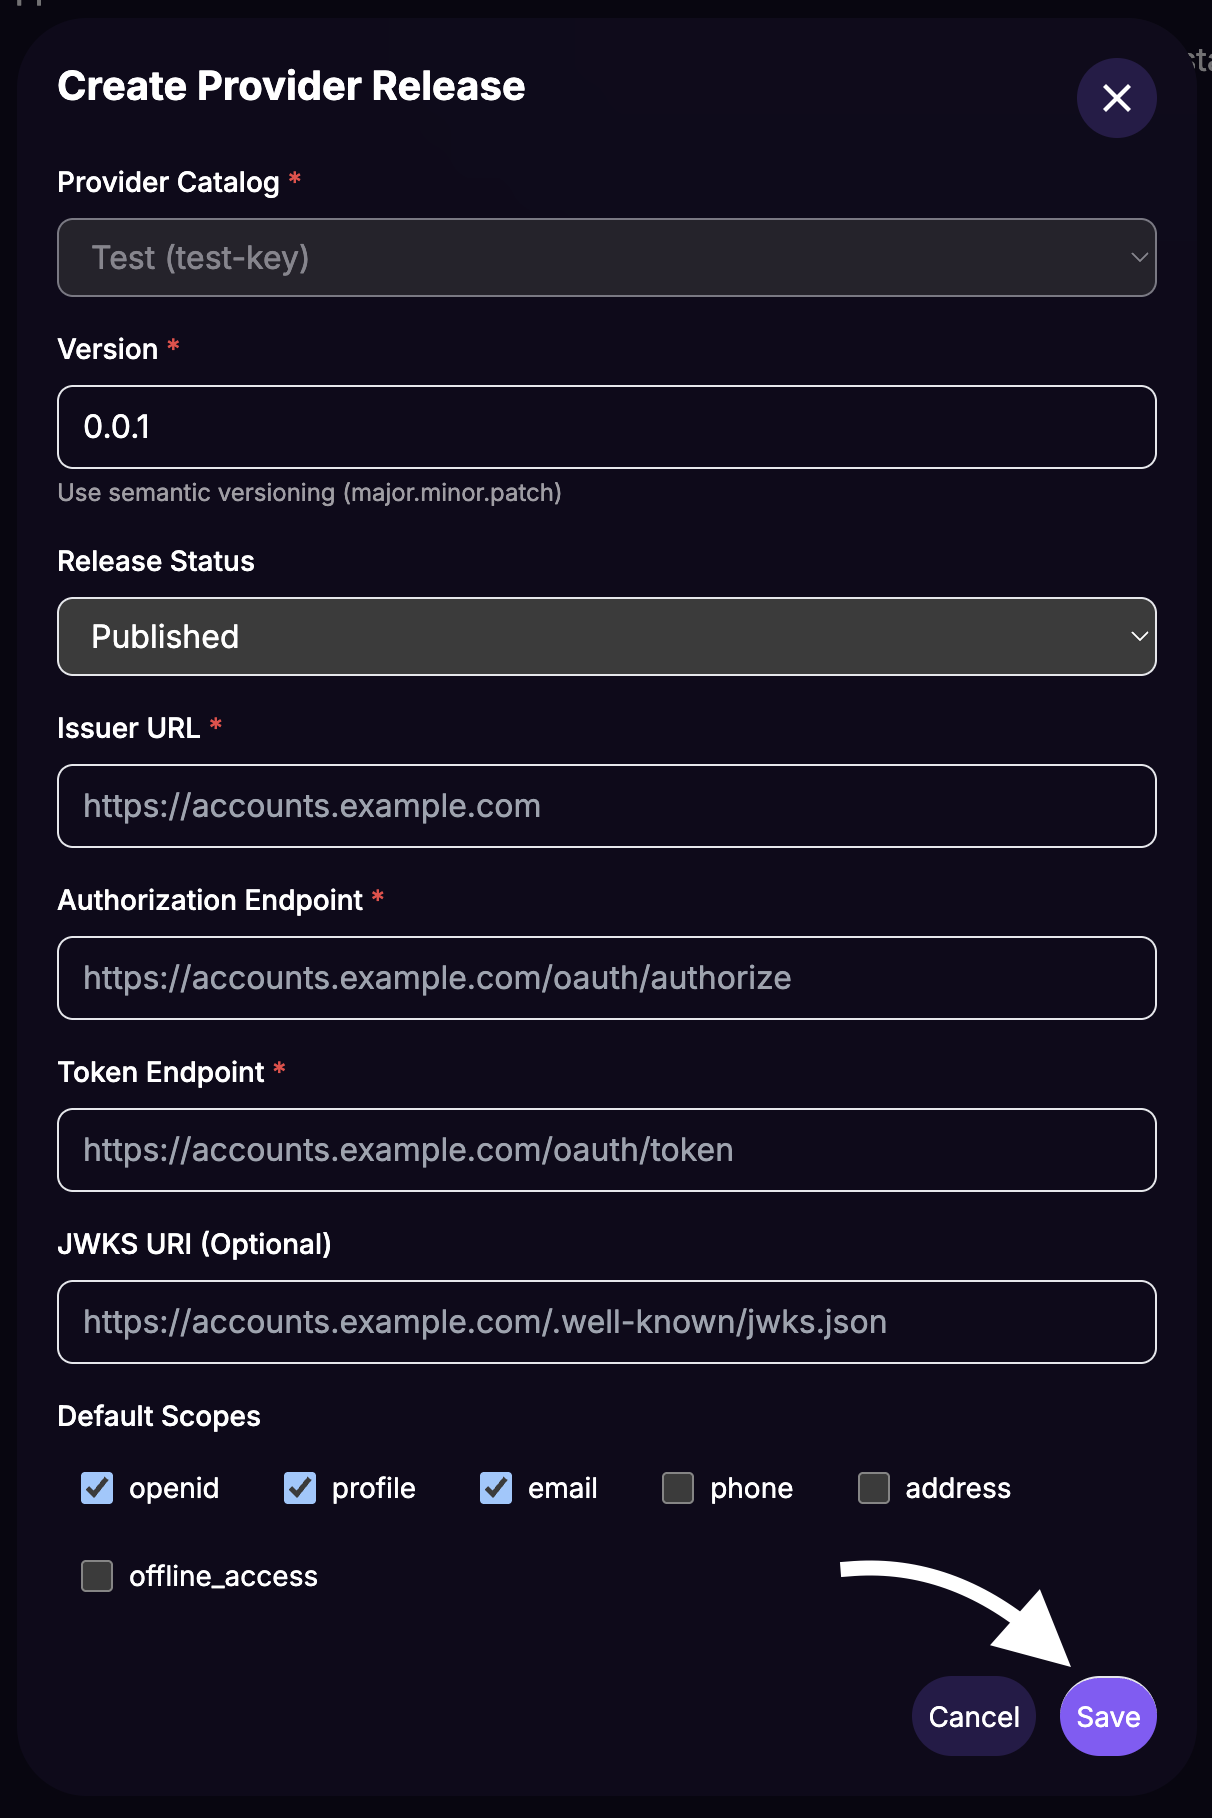
From the "SSO Management" sidebar select
OAuth Providersand click onAdd Oauth Provider.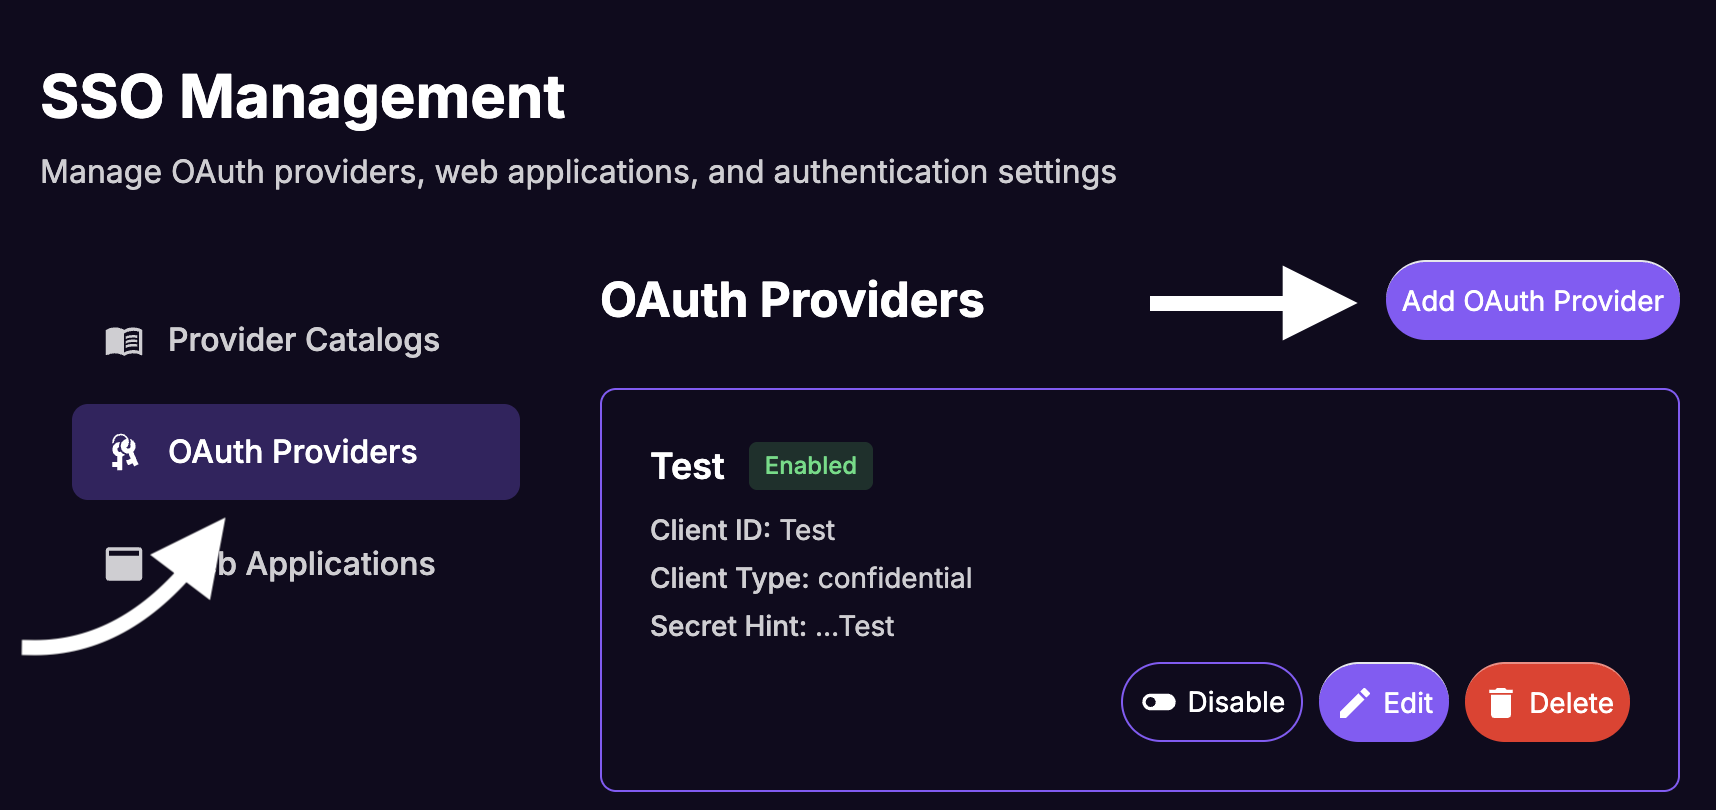
Fill in the data in the
Create OAuth Providermodal' form:Provider Release: Select the previously created release:
Your IdP Name - v1.0.0 (published).Client ID: The Client ID from your IdP application.
Client Secret: The Client Secret from your IdP application.
Where do I find the Client ID and Client Secret?
You'll find these values in the application/client settings of your identity provider's dashboard that you set up in Step #1.
Go back to the Register FanFest with Your Identity Provider step for details on how to get these values.
Scopes:
openid profile email(these scopes are required for the integration).Allowed Redirect URIs: Paste the URL to Your Website and ensure that you're using the SSL-protected scheme (https://).
Click on
Save.
From the "SSO Management" sidebar, select
Web Appsand click onAdd Web App.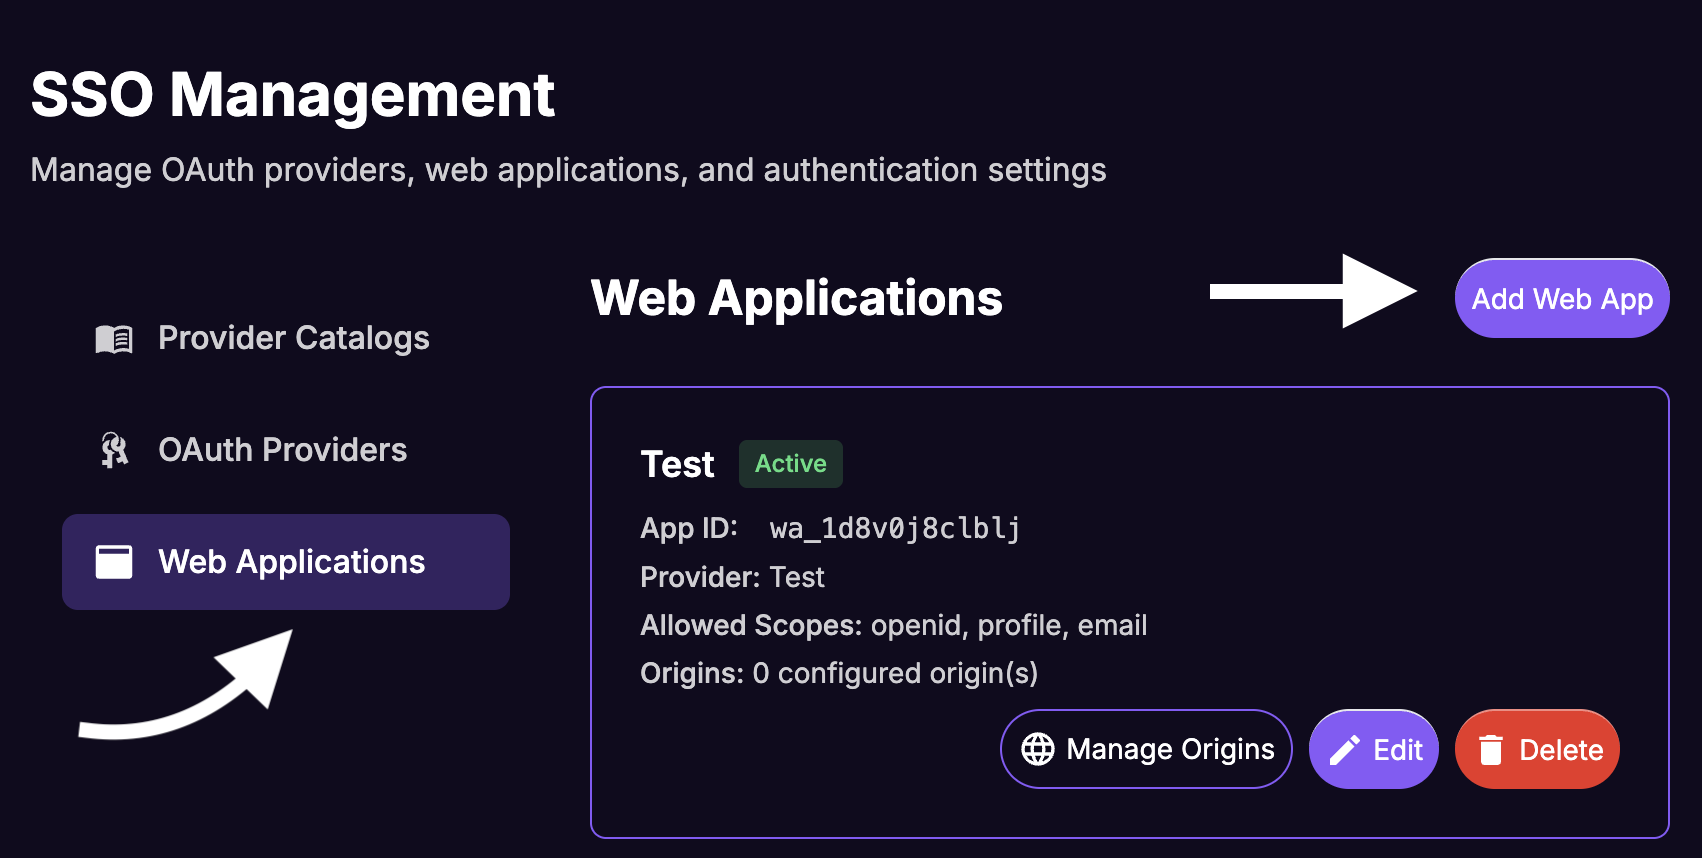
Fill in the data in the
Create Web Appmodal' form:- Application Name:
Your Website Web App(this is a user friendly name for the dashboard, not show to users). - OAuth Provider: Select the previously created provider:
Your IdP Name - v1.0.0 (published). - Requires PKCE: Leave checked.
- Allowed Scopes:
openid profile email(these scopes are required for the integration). - Click on
Save.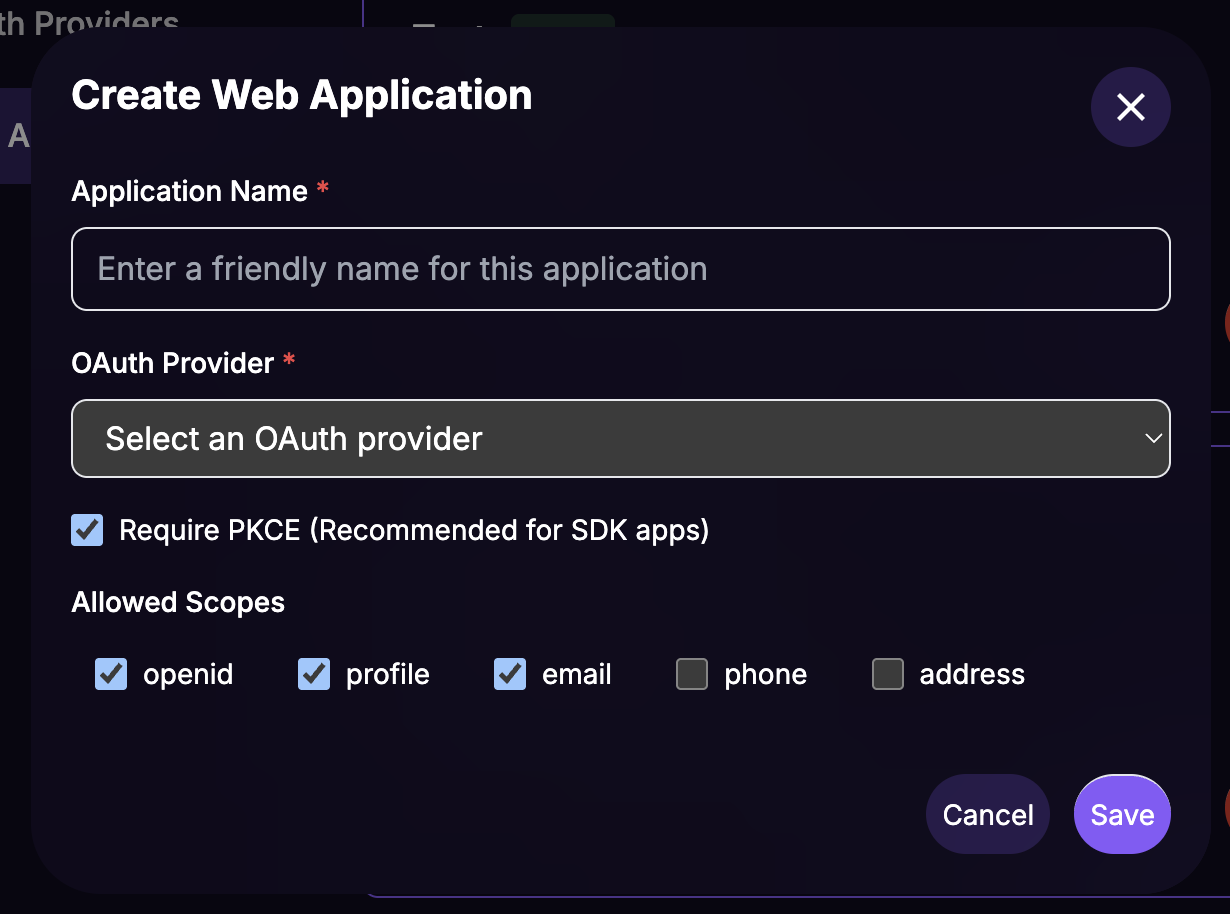
- Application Name:
From the Web Apps list, click on the
Manage Originsbutton for the newly created web app.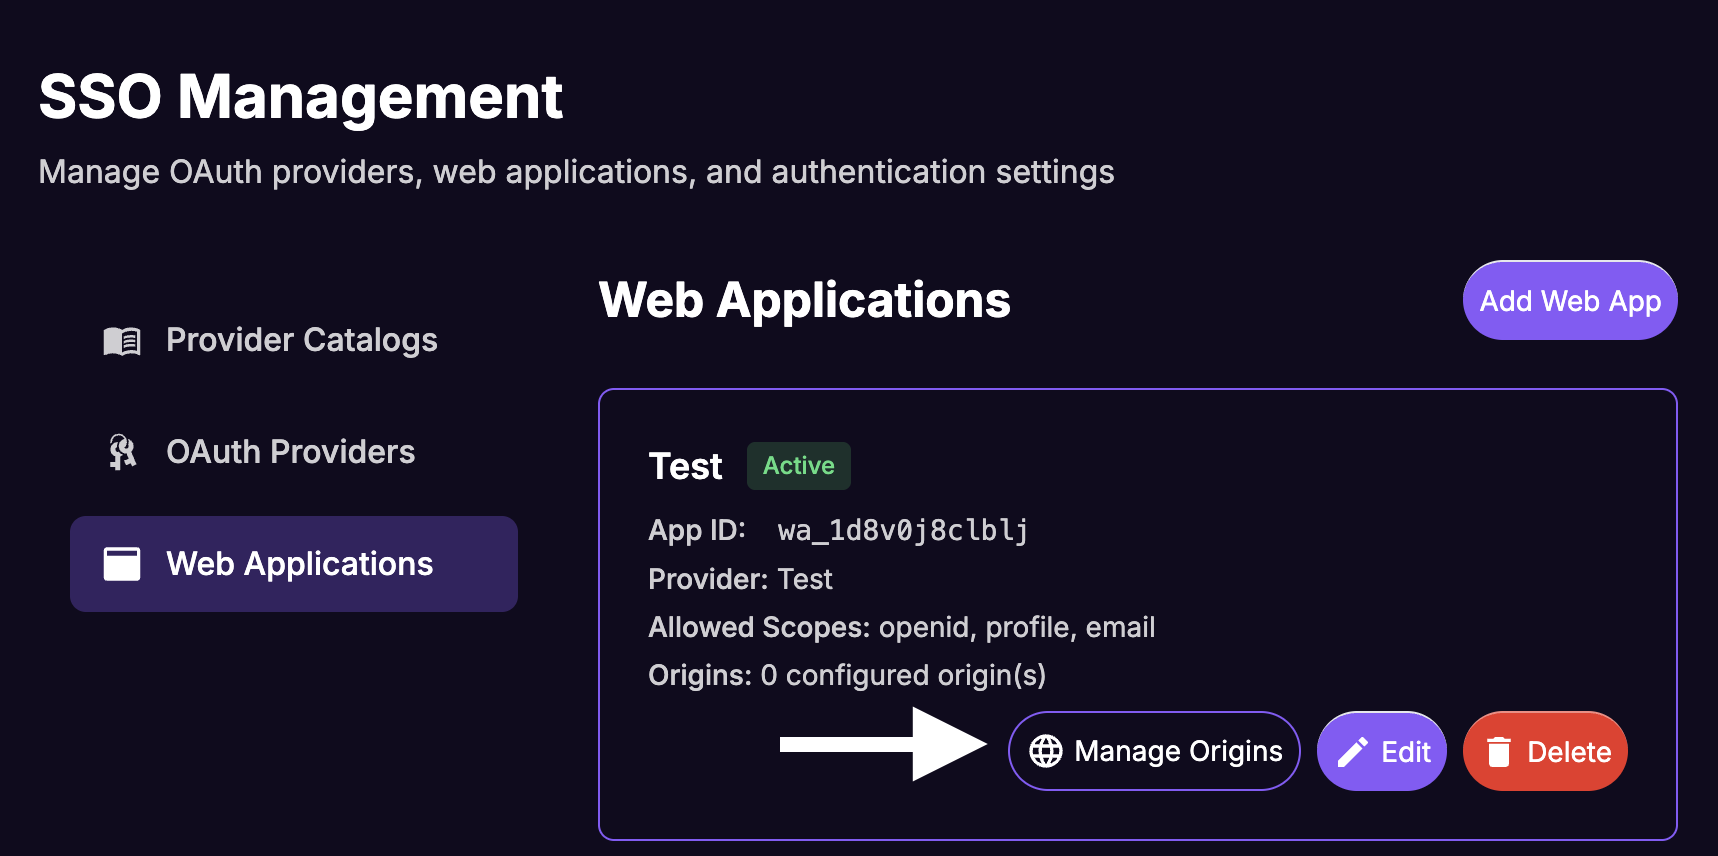
- Paste the URL of Your Website.
- Click on
Save.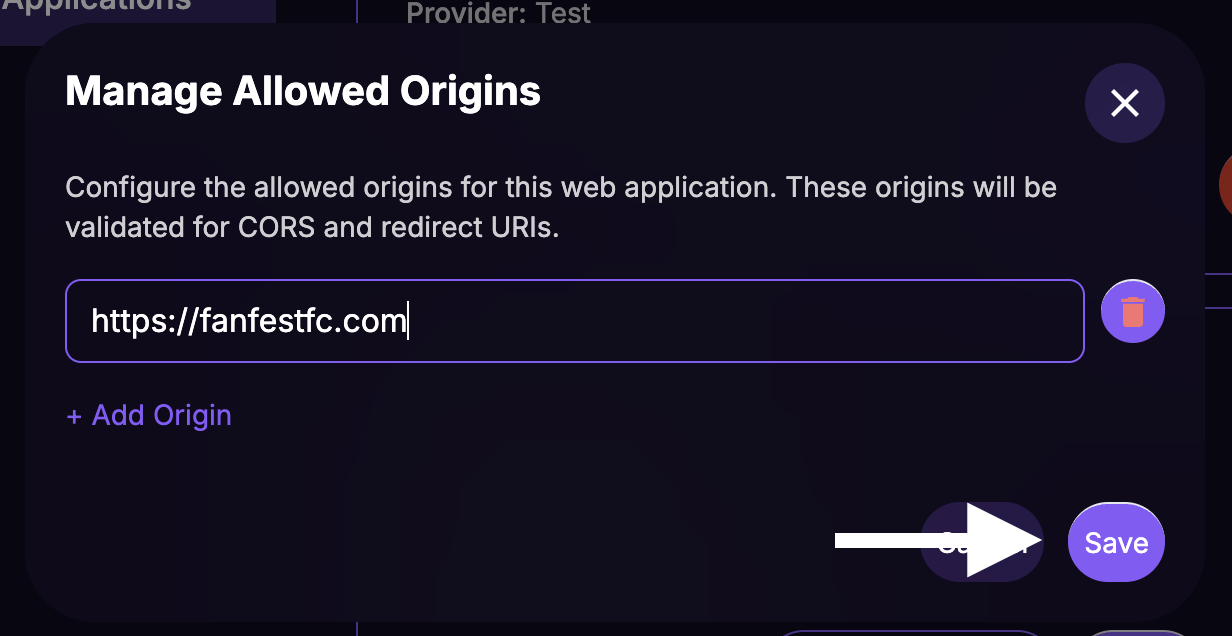
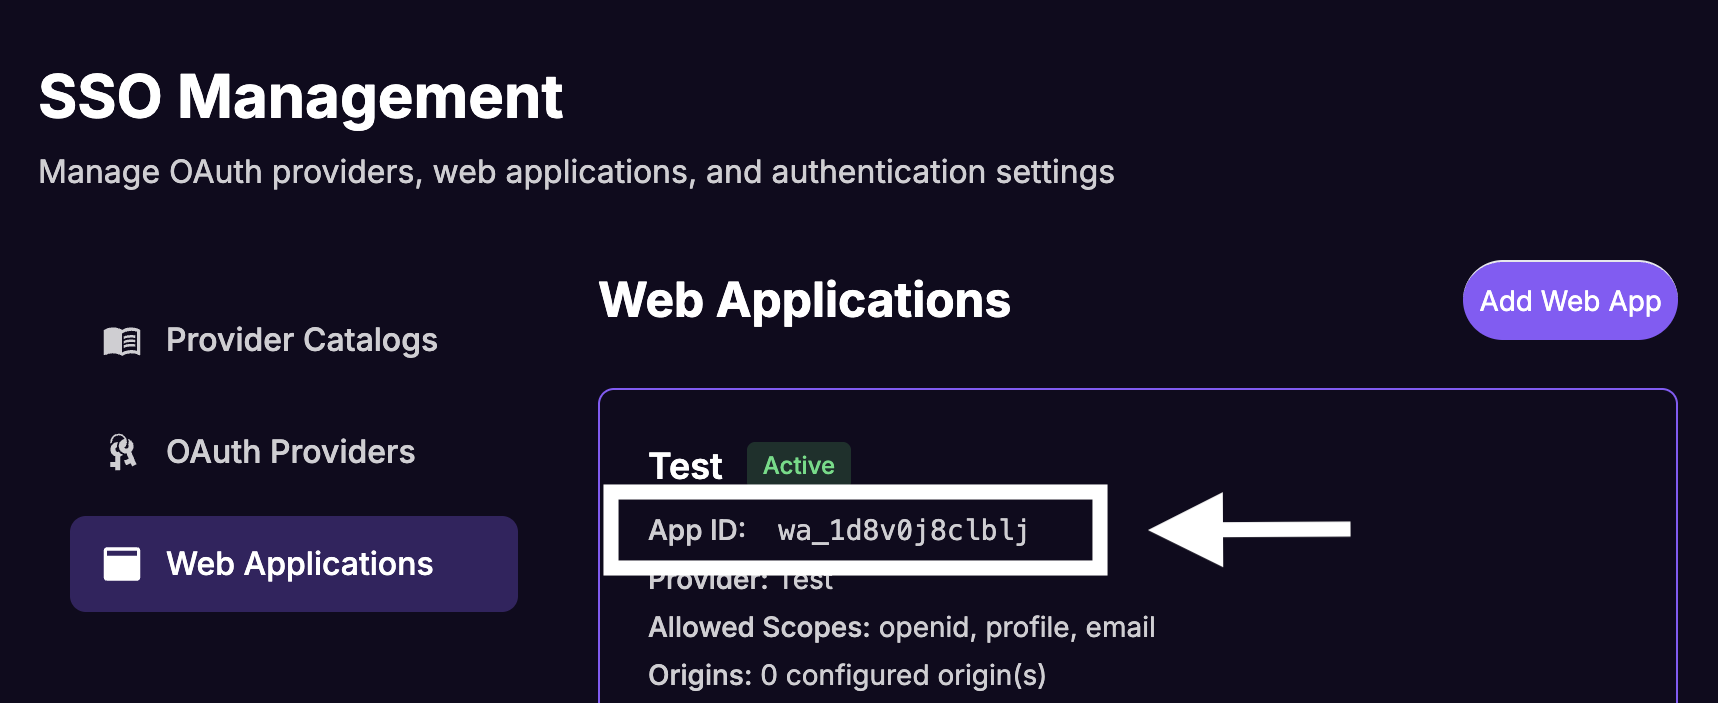
Note down the App ID from the Web Apps list for the newly created web app.
At this point, you have successfully configured your Identity Provider and Your Website in the FanFest dashboard.
Congratulations! 🎉
From here on, you'll only need the following details to complete the integration:
- App ID from the previously created web app in the FanFest dashboard.
Step 3: Integrate the FanFest SDK into Your Website
It's time to integrate the FanFest SDK into Your Website.
In order to do this, set the following snippet in the <body> of your website's HTML, replacing YOUR_WEB_APP_ID with the Web App ID from the previously created web app in the FanFest dashboard:
<script
  type="text/javascript"
  src="https://sdk.production.fanfest.vip/1.0.20/fanfest-sdk.js"
></script>

<script type="text/javascript">
  window.addEventListener("load", function () {
    const FanFestSDK = window.FanFestSDK;

    // Initialize with dev settings
    FanFestSDK.init({
      clientId: "YOUR_WEB_APP_ID",
      hostLoginFn: () => {
        // Trigger the login flow of Your Website here.
        //
        // This is used for a Call-To-Action to login from the SDK when not-logged-in users
        // see our toast notifications to be able to "claim" the rewards.
        //
        // Example: window.AuthService.login();
      },
    });
  });
</script>
With this snippet in place, the FanFest SDK should initialize correctly and be able to trigger loyalty rewards in Your Website.
However to allow your authenticated users to "claim" the points and rewards, you'll need to tell the SDK whenever a user logs in or logs out of your application, by calling the following methods:
// When the user logs in
window.FanFestSDK.login();

// When the user logs out
window.FanFestSDK.logout();
Why do I need to call this methods?
The FanFest SDK needs to know the authentication state of your users to properly attribute rewards and points. By calling login() and logout(), you inform the SDK about the user's current state, allowing it to trigger the silent authentication flow with your Identity Provider (IdP) as needed.
This ensures that users can seamlessly claim their rewards without having to log in again, providing a smooth user experience.
Do I need to pass any parameters to these methods?
No, both login() and logout() methods do not require any parameters. They simply notify the FanFest SDK about the user's authentication state change and allow it to handle the necessary processes internally.
See an example Auth0 integration code snippet
In our Auth0 example guide, we provide a complete code snippet demonstrating how to integrate the FanFest SDK with Auth0 for SSO. Feel free to refer to it for a practical implementation example.
Here's the relevant code snippet from that guide:
<script src="https://cdn.auth0.com/js/auth0-spa-js/2.0/auth0-spa-js.production.js"></script>
<script type="text/javascript">
  const logoutButton = window.document.querySelector("#logout-button");
  const loginButton = window.document.querySelector("#login-button");

  logoutButton.addEventListener("click", function () {
    window.Auth.logout();
  });

  loginButton.addEventListener("click", function () {
    window.Auth.login();
  });

  window.addEventListener("load", function () {
    window.Auth = (function () {
      function Auth() {
        const clientId = "YOUR_AUTH0_CLIENT_ID";
        const domain = "YOUR_AUTH0_DOMAIN";

        this.isLoggedInNow = false;

        this.client = null;

        this.clientPromise = auth0
          .createAuth0Client({
            domain: domain,
            clientId: clientId,
          })
          .then((client) => {
            this.client = client;
          });

        return this;
      }

      Auth.prototype.onLoggedIn = function () {
        this.getUser((error, profile) => {
          this.isLoggedInNow = true;

          // Hide the login button
          loginButton.style.display = "none";
          logoutButton.style.display = "block";

          logoutText = logoutButton.querySelector(".button__text");

          if (logoutText) {
            logoutText.innerHTML = "Logout from " + profile.name;
          }

          this.callListeners();
        });
      };

      const loginListeners = [];

      Auth.prototype.callListeners = function () {
        for (const callback of loginListeners) {
          callback();
        }
      };

      Auth.prototype.addLoginListener = function (callback) {
        loginListeners.push(callback);

        if (this.isLoggedInNow) {
          callback();
        }
      };

      Auth.prototype.authn = async function () {
        await this.clientPromise;
        const isAuthenticated = await this.client.isAuthenticated();

        if (isAuthenticated) {
          this.onLoggedIn();
        }

        // NEW - check for the code and state parameters
        const query = window.location.search;
        if (query.includes("code=") && query.includes("state=")) {
          // Process the login state
          await this.client.handleRedirectCallback();

          this.onLoggedIn();

          // Use replaceState to redirect the user away and remove the querystring parameters
          window.history.replaceState({}, document.title, "/");
        }
      };

      Auth.prototype.login = function () {
        this.client.loginWithRedirect({
          authorizationParams: {
            redirect_uri: window.location.origin,
          },
        });
      };

      Auth.prototype.logout = function () {
        this.client.logout({
          logoutParams: {
            returnTo: window.location.origin,
          },
        });
      };

      Auth.prototype.getUser = function (callback) {
        this.client
          .getUser()
          .then((user) => {
            callback(null, user);
          })
          .catch((error) => {
            callback(error, null);
          });
      };

      const auth = new Auth();

      return auth;
    })();

    // Show the right buttons from the get go.
    logoutButton.style.display = "none";
    loginButton.style.display = "block";

    window.Auth.authn();
  });
</script>

<script
  type="text/javascript"
  src="https://sdk.production.fanfest.vip/1.0.20/fanfest-sdk.js"
></script>

<script type="text/javascript">
  window.addEventListener("load", function () {
    const FanFestSDK = window.FanFestSDK;

    // Initialize with dev settings
    FanFestSDK.init({
      clientId: "YOUR_WEB_APP_ID",
      iframe: {
        backgroundColor: "#000",
      },
      hostLoginFn: () => {
        window.Auth.login();
      },
      hostRewardsFn: () => {
        // Do nothing
      },
    });

    window.Auth.addLoginListener(() => {
      FanFestSDK.login();
    });
  });
</script>
Note the integration points where the FanFest SDK's login() method is called upon successful authentication with Auth0.
That's it! You've successfully integrated SSO into your website using the FanFest SDK. Your users can now enjoy a seamless authentication experience while earning rewards for their engagement.
Continue
Create your first Channel Action to start tracking user engagement and rewarding your users!